











Kidney Transplantation Surgery

When you get a kidney transplant, a healthy kidney is placed inside your body to do the work your own kidneys can no longer do. On the plus side, there are fewer limits on what you can eat and drink, but you should follow a heart-healthy diet. Your health and energy should improve. In fact, a successful kidney transplant may allow you to live the kind of life you were living before you got kidney disease. Studies show that people with kidney transplants live longer than those who remain on dialysis. On the minus side, there are the risks of surgery. You will also need to take anti-rejection medicines for as long as your new kidney is working, which can have side effects. You will have a higher risk for infections and certain types of cancer.
This video in 30 seconds
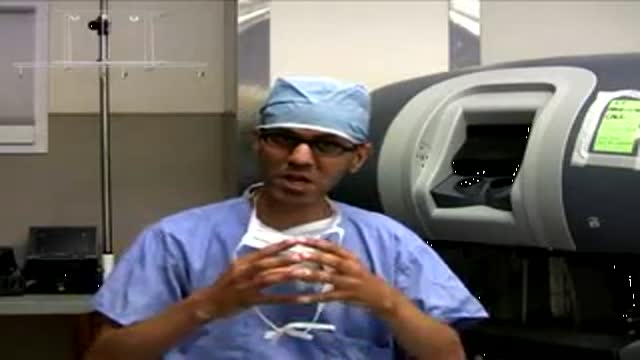
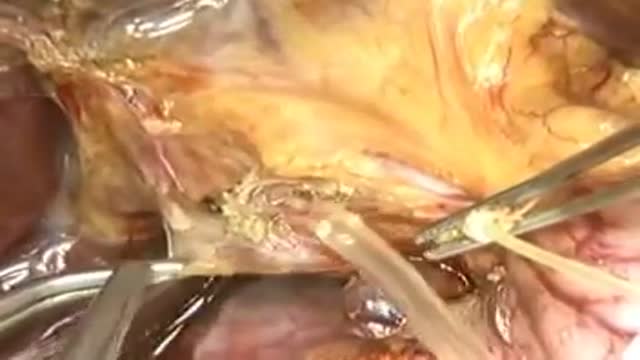
A narrated surgical teaching video of a living-donor kidney transplant, introduced by a transplant surgeon. Because this recipient also needs both native kidneys removed, the transplant is performed through a midline incision; the narration follows mobilisation of the colon, exposure of the iliac vessels, preparation and flushing of the donor kidney, the vein and artery connections, reperfusion, and finally the ureter-to-bladder connection with a stent.
Key points
- The colon is mobilised and retracted to expose the iliac vessels
- The donor kidney is flushed and its vessels and ureter are prepared
- A running connection is created between the renal vein and iliac vein
- The arterial connection follows, then clamps are released and the kidney changes colour with reperfusion
- The ureter is connected to the bladder with a stent left in place
Chapters
- 0:04 — Case introduction and midline approach
- 1:42 — Donor kidney preparation and flushing
- 3:31 — Renal vein anastomosis performed
- 6:30 — Arterial anastomosis and arteriotomy
- 8:24 — Clamps released, kidney reperfuses
- 9:43 — Ureter connected to bladder
Video Transcript
A narrated surgical teaching video of a living-donor kidney transplant, introduced by transplant surgeon Dr. Yolanda Becker. Because this recipient also needs both native kidneys removed, the transplant is performed through a midline incision; the narration follows the mobilization of the colon, exposure of the iliac vessels, the flushing of the donor kidney, the vein and artery anastomoses, and finally the ureter-to-bladder anastomosis with a stent left in place.
Read the full transcript
Hello, this is Dr. Yolanda Becker, and I'm a professor of surgery and the director of the kidney and pancreas transplant programs at the University of Chicago. Today you'll be viewing a living donor kidney transplant performed by Dr. Janet Bellingham, who is an assistant professor at the University of Wisconsin. This patient had refractory hypertension. The kidney transplant is being performed through a midline incision due to the fact that the patient also needed a bilateral native nephrectomy. The right colon is being mobilized and the white line of tilt is being divided.
The right colon will be retracted so that the iliac vessels can be accessed. The right colon is mobilized to the hepatic flexure. The lymphatics overlying the iliac vessels are being divided. If there's a retroperitoneal dissection, these lymphatics are ligated and divided to prevent future formation of lymphocytes. In a midline position, the incidence of lymphocytes is much lower, so one can simply bovi the lymphatics. The right iliac is being exposed. A vessel loop will be placed around the iliac, and again the lymphatics are ligated. A side-biting satynski clamp is used to clamp the iliac vein.
A sufficient amount of vein is being exposed so that the satynski can be placed easily. At this point, the kidney has been retrieved from the donor room. A left laparoscopic donor nephrectomy was performed. The vascular staple lines are partially divided on the artery and then the vein. When the kidney is flushed, the cannula is carefully placed in the renal artery, and cold solution containing heparin is flushed through the vessel. You can see the effluent through the vein is slowly becoming clearer, and the kidney is flushed for approximately one minute or until the effluent becomes clear.
The staple line has been partially kept in place so that the orientation is clear. The previously placed clips from the laparoscopic donor nephrectomy are replaced by ties. The gonadal vessel is being ligated. The clips are replaced by ties to prevent dislodging of the clips as the kidney is being handled during the transplant. Gerotis fascia is now being sharply dissected away from the kidney, taking care to preserve the blood supply from the lower third of the kidney to the ureter. The ureter is being demonstrated with its blood supply carefully preserved.
The renal vein is inspected, followed by the renal artery. And again the staple line is kept in place to maintain orientation. A small retractor is placed to expose the iliac veins and keep the lymphatic, the previously ligated lymphatic tissue retracted. Care must be taken when placing this retractor to not damage the vessels. The side biting satinsky clamp is placed on the iliac vein and a vanotomy is made using a right angle scissors. The clamp can be placed either with the handles cephalate or caudad depending upon what is
easier for placement of the kidney. The kidney orientation is carefully identified with the ureter towards the bottom and the bladder. Again a vanotomy is made with the right angle scissors and extended using the pot scissors. The vessel is irrigated with heparinized saline. A 6-0 proline suture is used to create the anastomosis. Three stace sutures are placed to allow triangulation of the vessel. This triangulation will help prevent any back walling during the creation of the anastomosis. A suture is placed in the most superior end of the renal vein and then the inferior end.
The suture can also be placed in the mid portion of the renal vein to allow for triangulation and opening of the vein. The kidney was placed in an iced sponge so that it can be kept cool during the venous and arterial anastomosis. The sutures are tied into place. Note that the Satinsky clamp prevents any leakage of blood from the iliac vein. A running anastomosis is created end to side from the renal vein to the iliac vein. As you can see the back wall anastomosis is being performed first.
By performing the anastomosis in this fashion there is minimal handling of the kidney. After completion of the back wall anastomosis the suture is tied to the inferior stitch. After the last stitch along the back wall the suture is brought to the outside of the anastomosis and the back wall suture is secured to the most inferior stitch. We then proceed with the front wall anastomosis. Then end to side, renal vein to iliac vein taking care not to catch the back wall during creation of the front wall anastomosis.
After the front wall anastomosis is completed the suture will be secured to the upper most pre-placed stitch. The last stitch is placed at the corner and the suture is tied on the outside of the vessel. At this point of the procedure a white bulldog clamp may be placed on the renal vein and the anastomosis can be tested for any leaks. This is an option that does not always need to be exercised. Attention is then turned to the arterial anastomosis. Covered Fogarty clamps are placed approximately and distally taking care not to disturb any
arterial plaque that may be present in the native artery. The small arteriatomy is made using a number 15 scalpel blade. A number 11 blade may also be used to make the initial arteriatomy. An aortic punch is used to extend the arteriatomy so that the shape of the arteriatomy is circular. Some surgeons prefer an elliptical punch for this arteriatomy. The renal artery is then sutured to the iliac artery in an end to side fashion using 6-0 proline in a running stitch. The external or common iliac artery may be used to perform this anastomosis depending
upon the peripheral arterial disease that is usually present in the recipient as well as the optimal placement of the kidney. And again the back wall of the arterial anastomosis is performed first. In a living donor transplant clearly this is an end to side anastomosis unlike in the deceased donor where a corral patch is available. There must be taken to ensure that the iliac artery arteriatomy is large enough to prevent any anastomotic stenosis. You can see in this procedure that the white bulldog clamp has been placed on the renal
vein. The previously placed side biting satinskis was removed which allows for better exposure for the arterial anastomosis as well as checking of the venous anastomosis for any bleeding prior to completing the arterial anastomosis. The white bulldog prevents any blood from getting into the kidney transplant. At this point in time the renal vein white bulldog clamp is removed and kidney reperfusion begins. You can see the clear change in color after removal of the vascular clamps. The renal vein clamp is removed followed by the distal arterial clamp and then the proximal arterial clamp is removed.
Some surgeons prefer to keep the distal arterial clamp in place to allow increased perfusion to the kidney. The anastomoses are carefully inspected for any bleeding. Bleeding along the renal hyaline is identified and ligated. Bleeding along the renal capsule is identified and usually controlled by use of electrocautery. Care must be taken when ligating any bleeding points within the hyalum or near the lower third of the kidney so that the blood supplied at the ureter is carefully preserved and the ureter is not damaged. In a living donor transplant urine output should be immediately after
reperfusion which is nicely demonstrated here. Attention is then turned to the neoyuriduristostomy. The bladder is identified and the muscular layer is divided using electrocautery. The bladder had been previously irrigated with antibiotic solution. In this case the leash technique is being used as an anti reflux technique when implanting the ureter. Mucosa is identified. The bladder does tend to be quite vascular and any small bleeding points can be controlled using electrocautery. Mucosa is entered sharply and return of the irrigation ensures placement into the bladder. The ureter has been cut to an appropriate length and spatulaated.
An absorbable monofilament suture is used to create the synastomosis. A proximal and distal stitch is placed and then a continuous end to side anastomosis will be performed. When doing the synastomosis a small bite should be taken on the ureter side and a much larger bite on the bladder side. The ureteral stent is placed and will be kept in place for four to six weeks and removed by cystoscopy. The ureter is now being sutured.
Transcript auto-generated from the video’s audio for accessibility and study. Educational content only — not medical advice.
Video Overview
From our Surgery Videos collection: Surgery videos: watch real operations step by step — general, laparoscopic and specialist surgery performed in the OR, explained for students and surgeons. Browse all Surgery Videos videos →
SORT BY-
Najbolji komentari
-
Najnoviji komentari