
- Physical Examination
- Surgical Examination
- Ophthalmology
- Clinical Skills
- Orthopedics
- Surgery Videos
- Laparoscopy
- Pediatrics
- Funny Videos
- Cardiothoracic Surgery
- Nursing Videos
- Plastic Surgery
- Otorhinolaryngology
- Histology and Histopathology
- Neurosurgery
- Dermatology
- Pediatric Surgery
- Urology
- Dentistry
- Oncology and Cancers
- Anatomy Videos
- Health and Fitness
- Radiology
- Anaesthesia
- Physical Therapy
- Pharmacology
- Interventional Radiology
- Cardiology
- Endocrinology
- Gynecology
- Emergency Medicine
- Psychiatry and Psychology
- Childbirth Videos
- General Medical Videos
- Nephrology
- Physiology
- Diet and Food Health
- Diabetes Mellitus
- Neurology
- Women Health
- Osteoporosis
- Gastroenterology
- Pulmonology
- Hematology
- Rheumatology
- Toxicology
- Nuclear Medicine
- Infectious Diseases
- Vascular Disease
- Reproductive Health
- Burns and Wound Healing
- Kidney Zone Podcast
- Other











Blood Pressure and Pulse

Educational only: videos on MedicalVideos.com are for general information and are not medical advice. Always consult your own doctor about your health.
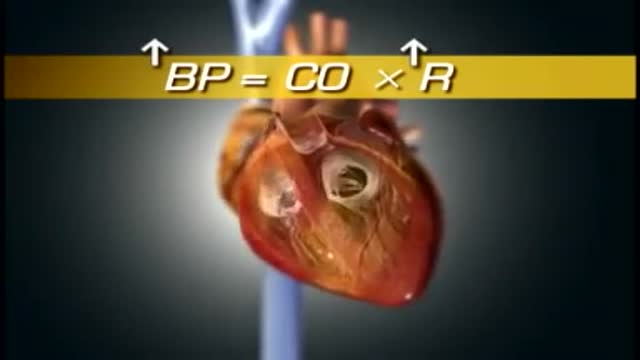
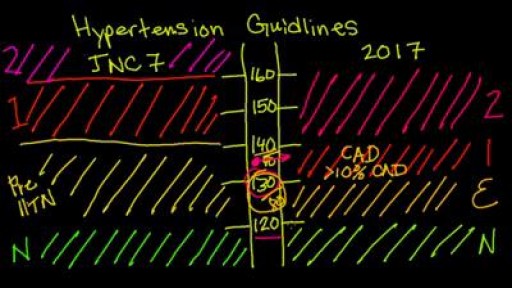
Optimal blood pressure typically is defined as 120 mm Hg systolic — which is the pressure as your heart beats — over 80 mm Hg diastolic — which is the pressure as your heart relaxes. For your resting heart rate, the target is between 60 and 100 beats per minute (bpm)
This video in 30 seconds
In this demonstration, Dr. Mark Swartz measures blood pressure and pulse on a standardized patient. He shows the different cuff sizes, estimates systolic pressure by palpation first to avoid the auscultatory gap, measures in both arms, and checks for orthostatic change when the patient sits up. The session finishes with heart rate and respiratory rate.
Key points
- Four cuff sizes are shown and correct cuff sizing is emphasised
- Systolic pressure is first estimated by palpation to avoid the auscultatory gap
- Blood pressure is measured in both arms by auscultation
- Orthostatic hypotension is tested by measuring again after sitting up
- Heart rate and respiratory rate complete the vital-signs assessment
Chapters
- 1:01 — Choosing the correct cuff size
- 2:11 — Estimating pressure by palpation
- 3:09 — Measuring by auscultation
- 4:15 — Measuring the other arm
- 5:27 — Testing for orthostatic hypotension
- 6:41 — Heart rate and respiratory rate
Key Steps — Measuring blood pressure (and pulse)
From a complete physical-examination demonstration by Dr Mark Swartz (Mount Sinai). The checklist follows its blood-pressure segment in detail.
- Wash your hands, introduce yourself, and make sure the patient is comfortable and rested.
- Choose the correct cuff size for the patient's arm — standard adult, large adult, paediatric, or a thigh cuff for the leg. The wrong size gives an erroneous reading.
- Apply the cuff on the bare arm with its lower border about an inch above the antecubital fossa.
- First, estimate the systolic pressure by palpation: feel the brachial pulse while inflating the cuff until the pulse disappears, then note where it returns as you deflate. This guards against missing an auscultatory gap.
- Now measure by auscultation: place the stethoscope over the brachial artery, inflate above the palpated estimate, and deflate slowly, recording where the sounds appear (systolic) and disappear (diastolic).
- For a leg measurement, apply the thigh cuff and listen with the stethoscope in the popliteal fossa; leg systolic pressure normally reads higher than the arm's.
- Finish the vital-signs pair by palpating the pulse: note the rate counted over a full interval, the rhythm, and the character of the beat.
- Record both values, the arm or leg used, the cuff size and the patient's position.
Steps summarise this demonstration for education. Always follow your institution's protocol. More Monitoring & Assessment skills →
Video Transcript
Dr. Mark Swartz of the Mount Sinai School of Medicine demonstrates blood-pressure and pulse measurement on a standardized patient, Mr. Johnson. He covers the four cuff sizes, estimating systolic pressure by palpation first to avoid the auscultatory gap, measuring in both arms, testing for orthostatic hypotension when the patient sits up, and finishing with heart rate and respiratory rate.
Read the full transcript
Hi, I'm Dr. Mark Swartz from the Mount Sinai School of Medicine and today I'm going to be demonstrating the complete examination of the man and the breast and the pelvic examination of the woman. The complete examination has many, many different components, most of which I will be demonstrating today. However, in actual practice, the physical examination is dictated or focused by the patient's history and the patient's chief complaint. Mr. Johnson, hi, I'm Dr. Swartz. How are you today? Good. Before we begin the examination, I'm just going to wash my hands. Are you comfortable?
Yeah, I'm fine. Okay, great. The first part of the examination involves blood pressure determination. Blood pressure determination is a very important part of the physical examination. It's very important, however, that you use the proper size cuff for the patient. If one were to use a large cuff for a person's arm which might be small, you would erroneously record a high blood pressure. And the converse is also true. This is a standard adult cuff. And this is the type of cuff which you usually will have in examination rooms.
There are three other cuffs. This is the large adult cuff. And this is used on the arms of patients who are obese or happen to have very large arms. This is a pediatric cuff which is obviously used for children. And the fourth cup is the thigh cuff which is used for blood pressure determination in the lower extremity. Remember that blood pressure in the lower extremity is always higher by about 15 to 20 millimeters than in the upper extremities. This is applied to the thigh and the stethoscope is placed in the popliteal fossa for evaluation.
The first blood pressure is always assessed by palpation. Notice that the cuff is applied with a lower border about one inch above the anti-cubital fossa. One can place either thumbs or fingers on the brachial artery and inflate the cuff rapidly all the way up to about 240, 250, 260 millimeters of mercury. And then rapidly reduce the pressure. And at the point of palpation of the pressure, you will rapidly reduce the pressure in the cuff. We do this to rule out an ascultatory gap which is very common.
Now after we've ascertained the peak systolic pressure, which was about 120 in Mr. Johnson's case, we will now do blood pressure by ascultation. And what we will do here is we will place the diaphragm of the stethoscope over the brachial artery and blow up the blood pressure cuff to about 15 or 20 millimeters higher than that which we palpated. So I'm going to blow up the blood pressure cuff now to about 140 and now very slowly I am going to reduce the pressure. The first sounds were heard at 120. The point of muffling was at 80 and the point of disappearance was at 75.
So Mr. Johnson's blood pressure is 120 systolic. 80 is the point of muffling and 75 is the point of extinction. It's very important to measure blood pressure to the nearest five millimeters of mercury because if you were to say a blood pressure would be 127 over 79, this implies a false sense of accuracy of the determination. After blood pressure determination in the right arm, we are now going to do blood pressure by ascultation in the left arm. We are now going to proceed with blood pressure in the left upper extremity. We only have to do blood pressure by ascultation since we already know what the peak systolic pressure is.
Mr. Johnson may just lift this up. Remember that the brachial artery is medial in the anti-cubital fossa and the blood pressure cuff is applied just as we did for the right arm. Placing the mark of artery medial in the anti-cubital fossa, we will now proceed with blood pressure by ascultation. We will pump up the blood pressure cuff to about 20 millimeters higher than systolic and deflate the cuff slowly to record systolic blood pressure and diastolic blood pressure. The final assessment of blood pressure determination is orthostatic hypotension.
What I'm going to ask you to do, Mr. Johnson, is when I tell you I'd like you to sit up rapidly. Make sure that you are ready to determine blood pressure determination by having the set screw properly tightened. Mr. Johnson, I'm going to ask you to sit up in just a moment. Okay, are you ready? The set screw is tightened. Please sit up for me now. Again, blood pressure is determined by pumping the cuff up about 20 millimeters above systolic. We now record the systolic and diastolic blood pressures.
How do you feel, Mr. Johnson? Fine. Does it all? No. Okay, if orthostatic hypotension were present, we would record a drop in the systolic blood pressure as well as usually an increase in the heart rate. This concludes our blood pressure determinations. We're now going to conclude our assessment of vital signs with the determination of heart rate and respirations. We determine heart rate first by the assessment of placing our hands on the radial artery, and we can do this bilaterally as I'm demonstrating now. We will never use our thumbs for determination of the radial arterial pulse.
We could also assess the brachial artery, and this can be assessed with either our thumbs or with the other fingers of our hand, and this can be assessed bilaterally as I'm demonstrating. We now want to assess respiratory rate, and one easy way of doing that is to turn your eyes up to the patient's chest and observe them while they're breathing at the same time you are watching your watch to determine the respiratory rate. This way the patient is unaware that you're counting their respirations, and they are not consciously changing the speed of their respirations.
Transcript auto-generated from the video’s audio for accessibility and study. Educational content only — not medical advice.
Video Overview
From our Physical Examination collection: Watch physical examination videos step by step — cardiovascular, respiratory, abdominal and neurological exams demonstrated for medical students and clinicians. Browse all Physical Examination videos →
Medical Videos
Free medical and surgery videos for patients, students and professionals — trusted since 2007.
Founded by Dr. Mohamed Ibrahim, MD, PhD — physician-scientist.
Follow us on Facebook · Instagram
SORT BY-
Top Comments
-
Latest comments