
- Physical Examination
- Surgical Examination
- Ophthalmology
- Clinical Skills
- Orthopedics
- Surgery Videos
- Laparoscopy
- Pediatrics
- Funny Videos
- Cardiothoracic Surgery
- Nursing Videos
- Plastic Surgery
- Otorhinolaryngology
- Histology and Histopathology
- Neurosurgery
- Dermatology
- Pediatric Surgery
- Urology
- Dentistry
- Oncology and Cancers
- Anatomy Videos
- Health and Fitness
- Radiology
- Anaesthesia
- Physical Therapy
- Pharmacology
- Interventional Radiology
- Cardiology
- Endocrinology
- Gynecology
- Emergency Medicine
- Psychiatry and Psychology
- Childbirth Videos
- General Medical Videos
- Nephrology
- Physiology
- Diet and Food Health
- Diabetes Mellitus
- Neurology
- Women Health
- Osteoporosis
- Gastroenterology
- Pulmonology
- Hematology
- Rheumatology
- Toxicology
- Nuclear Medicine
- Infectious Diseases
- Vascular Disease
- Reproductive Health
- Burns and Wound Healing
- Kidney Zone Podcast
- Other

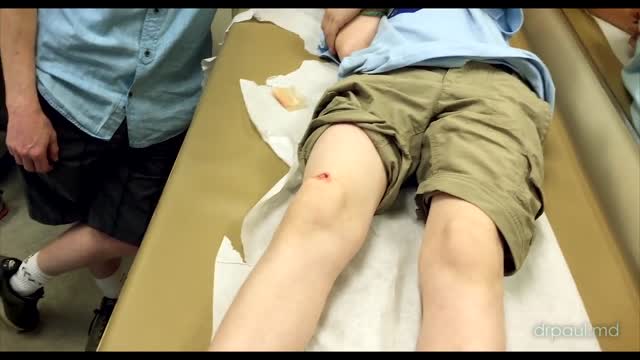
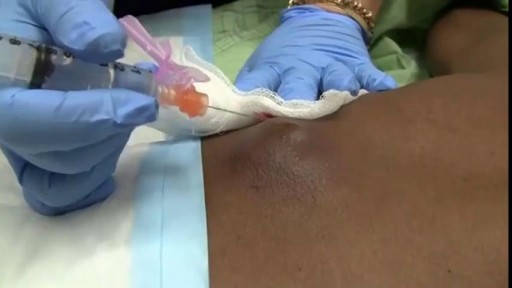
All Suture Techniques Part 2

Educational only: videos on MedicalVideos.com are for general information and are not medical advice. Always consult your own doctor about your health.
are you a medical student, a resident, a primary care physician or you practice in an emergency department, you can improve your suture skills with this detailed instruction. As you practice towards a cosmetically perfect technique, your confidence will increase, especially when dealing with complex wounds. Areas of study include: methods of closure, closure materials, anesthetics, suture removal, infection, prophylaxis, when to call in a plastic surgeon, recapping techniques and more
This video in 30 seconds
The second part of a long suturing masterclass in which the instructor demonstrates technique after technique with continuous detailed commentary. Simple interrupted sutures and instrument ties, subcutaneous and running patterns, vertical and horizontal mattress sutures and several specialised patterns are shown, with constant attention to bite depth and width, wound-edge eversion, spacing, knot tension and avoiding tissue damage or cross-hatch scarring.
Key points
- Simple interrupted sutures are tied with attention to tension and knot placement
- Instrument ties and subcutaneous sutures for wound strength are demonstrated
- Running sutures are shown as an efficient pattern for suitable wounds
- Vertical mattress sutures are demonstrated for obtaining wound-edge eversion
- Horizontal mattress, figure-of-eight and subcuticular patterns are also demonstrated
Chapters
- 0:00 — Simple interrupted sutures demonstrated
- 2:04 — Instrument tie technique shown
- 3:07 — Subcutaneous sutures for strength
- 4:14 — Running suture pattern demonstrated
- 7:41 — Vertical mattress sutures for eversion
- 9:10 — Horizontal mattress sutures shown
- 12:20 — Figure-of-eight sutures for scalp
- 15:02 — Subcuticular sutures for cosmesis
Video Transcript
The second part of a long suturing masterclass. The instructor demonstrates technique after technique — simple interrupted sutures and instrument ties, vertical and horizontal mattress sutures, and running patterns — with constant attention to bite depth and width, wound-edge eversion, suture spacing, knot tension, and avoiding tissue necrosis or the cross-hatch 'railroad track' scar. The narration is a continuous, detailed commentary on hand position and thread handling.
Read the full transcript
ends of the needle down flat on the skin. And this automatically causes the suture to take a deep bite, resulting in the aversion. As you can see, I am approximately the same distance on both sides of the wound. Once this is tied and you don't want it too tight, you then tie the second knot and when you're just about down to the other knot, lift it so that the second knot ties on the first knot so that you are, again, not too tight. This prevents necrosis and cross-hatching or railroad tracking.
With proline, which is what I almost exclusively use, I tie approximately four knots like this and then pull the knot to one side. And I cut both ends just long enough so that whoever is going to remove the sutures has something to grab a hold of. The second suture is the reasonable distance apart. It depends on who you talk to as to how far apart it should be. Some plastic surgeons put sutures very close together, but essentially a half a centimeter is a good distance between sutures sometimes farther.
And as you can see, the first time I tie the knot, I go around the tool twice. The second, third, and fourth times I circle once. Again, I lift it up the knot on the second time to prevent the wound from being potentially compromised by too tight a knot. And this results in excellent approximation of the wound margins. For an instrument tie, with the first stitch, the needle goes through the wound margins. The thread is wrapped around the instrument twice in the forward direction. The end is grasped and it's pulled off the instrument and laid down, not tight, but right on the wound.
The second throw goes over once. The end is grasped. And again, it's tied down and then forward. One loop over the instrument, forward, tied down, one loop backwards over the instrument. And usually, four or five of these alternating ties produce good wound strength. Subcutaneous sutures are used to give strength to the wound. And this is the technique. You simply enter one side of the laceration superficially, come out deep. The opposite side, enter deep, exit superficially, making sure that both sides of the suture are on the same side of the loop.
And you tie this, which pulls the wound together very neatly. Now, I prefer buried subcutaneous sutures, particularly in the oral mucosa, because that leaves no knot near the surface. I also use these on the face because there's no palpable or visible knot through thin skin. And again, usually three or four knots. I prefer four knots is enough to give good tensile strength. A running stitch is an efficient stitch to become comfortable with because it's rapid, probably two to three times faster than simple interrupted sutures. And this can be used in areas where there isn't too much strain, such as the scalp. That's probably the most usual, most frequently used area.
Now, it's essentially starting the same as a simple stitch. Both sides of the needle down, a wide bite is taken, exiting at approximately the same distance on the other side of the wound. So, so far this is the same as a simple interrupted suture. It's then tied the same way, but instead of cutting the end, you now continue entering the same distance that you plan on each side of the wound, but exiting a little bit distal from the beginning stitch. And now you come directly across from that exit, enter here, angle to the other side, same distance apart again from between here and here.
Enter directly across, exit angled, across the other side. And as you can see, this pulls the wound together very nicely and it is very fast and efficient. Enter directly across and at the end of the wound, you exit and this is where you tie. Put snug, but not too tight and you're actually going to use the loop as the end of the suture to tie. So you go around twice, grab the end of the loop and you tie like this. Again, approximately four times and you have a nicely, rapidly sutured wound.
Now, one of the problems with this is if an infection occurs, then people are concerned that the whole sutured laceration has to be de-hissed in order to do that. But in actuality, if this was actually this long, it is possible if there was an infection just in this area, simply to remove, by cutting this area, remove this, remove perhaps half of this, allow the infection to be relieved here, and then stereostrip down the little remaining area of stitch or even pull it through a bit more here and stereostrip this here.
Works very well, especially if this was two times longer. Ritical mattress sutures are excellent to obtain eversion, particularly when simple interrupted sutures will result in inversion of the wound. Sometimes one margin of the wound is undermined, so it is difficult to get the two sides together without inversion. To obtain this result, we essentially start out with a simple suture entering and exiting equal distance from the wound,
and then reversing, entering close to the wound margin, approximately a millimeter or so away, and exiting on the opposite side, same distance from the wound margin, and then tying as you would a simple interrupted suture. And you can see how the wound has been averted. This is excellent for Cosmesis because when the sutures are eventually removed, this will flatten out, and again there will be no dimpling, no shadowing effect. The horizontal mattress suture is used only on the palms and the soles, and this is used because it is twice as fast as a vertical mattress suture.
It can be used on these surfaces because the epidermis is so thick it doesn't matter that the eversion does not result in approximation of the epidermis. This is performed in this manner. The needle is inserted similar to a simple interrupted stitch. And instead of entering here and exiting here as one would for a vertical mattress, the needle is moved over as if the next stitch is being performed, entering there, exiting equal distance on the opposite side, and then the tie occurs on the string, not across the wound itself,
resulting in eversion, but the eversion is not as neat as with the vertical mattress because the epidermis does not touch. Again on the soles and the palms, it does not matter because this is divided-lized tissue. Again, it's very fast and efficient for those two locations. Y or V-laceration mattress sutures are effective in preventing necrosis of the tip of the flap. In a laceration such as this where there is a Y formation, one is tempted to insert the needle through the tip and then through one side of the laceration.
The problem with this is the very tenuous blood vessels at the very end of this flap will be compromised because of the pressure applied by the tied suture. To prevent this, we use the Y or V-laceration mattress suture. This is a very handy procedure. You enter on one side of the base of the V or Y. Then, subcutaneously traverse and then exit directly opposite on the other wound margin. Now, as you can see, that can be performed with just one motion. When this is tied, there is no pressure on the blood vessels at the tip because the actual tip is not involved, only the subcutaneous tissue.
This ends up with an excellent closure also. The figure of eight suturing is excellent for scalp lacerations when there is bleeding because the blood vessel that is bleeding has pressure applied by the figure of eight suture. It is applied like this. You enter on one side of the wound. You exit at an angle on the opposite side, not directly across, and then you re-enter directly across from the original insertion and cross over exiting across from the second area here. So what you've created is a figure of eight.
When this is sutured, you end up with some degree of aversion plus pressure on a vessel inside. And frequently, that is all you need to prevent scalp bleeding rather than trying to find the small vessel and tie it off. A slip knot is a very effective suture, especially with young children. The sutures can be removed without having to come at the child with instruments, especially a blade or an iris, scissors, and a forceps. You're able to remove it simply by removing the proxy strip or seristrip, grasping the end of the suture and pulling it.
It's inserted identically to a simple skin suture. The only difference is that after the two turns, instead of grabbing the end of the suture material, you grab it in the middle resulting in a small loop like this. Each time you tie it, you grab the loop instead of the end. After four ties, you then cut the end connected to the needle and cut that quite short so you'll know the difference. To prevent the child from removing this, one piece of seristrip or proxy strip is very effective.
When it's time to remove it, you simply grasp the long end with your fingers and it comes out. Although the tension or the tensile strength prior to removal is the same as a regular simple suture. Subcuticular sutures are excellent for obtaining very good cosmesis, especially on face lacerations. If this is the laceration, one would enter proximal to the wound, exiting inside the wound, just under the dermis. One then weaves back and forth underneath the surface, just a millimeter below the skin surface. Back and forth, you reach the opposite end.
It's okay if you backtrack a little bit so that you actually enter proximal to the exit on the opposite side. Again, this is all just underneath the surface. Small little bites making sure that you don't go through the loop with the suture material. This is somewhat more time consuming than simple sutures, but the nice aspect is there is no cross hatching possibility whatsoever because there are no sutures crossing the wound. As you exit, you do the same as when you started. You come out now distal to the wound, resulting in a very fine scar that you can actually pull the suture material through.
And then to tie it, each side is treated as if you are tying a slip knot. The proximal side is tied off with a small knot each time grabbing the loop. Usually four knots are all there needed. And the same procedure on the opposite side. Stretch it out until you have just the right amount of tension on both sides. This loop can be made a bit larger if you wish, but it isn't...
Transcript auto-generated from the video’s audio for accessibility and study. Educational content only — not medical advice.
Video Overview
From our Emergency Medicine collection: Real ER cases, trauma care, resuscitation and urgent procedures performed under pressure. Browse all Emergency Medicine videos →
Medical Videos
Free medical and surgery videos for patients, students and professionals — trusted since 2007.
Founded by Dr. Mohamed Ibrahim, MD, PhD — physician-scientist.
Follow us on Facebook · Instagram
SORT BY-
Top Comments
-
Latest comments