
- Procedures & Tests
- Symptoms A-Z
- Drug Guide
- Lab Values
- Vital Signs
- Muscles A–Z
- Clinical Signs
- Medical Abbreviations
- Medical Terminology
- Physical Examination
- Surgical Examination
- Ophthalmology
- Clinical Skills
- Orthopedics
- Surgery Videos
- Laparoscopy
- Pediatrics
- Funny Videos
- Cardiothoracic Surgery
- Nursing Videos
- Plastic Surgery
- Otorhinolaryngology
- Histology and Histopathology
- Neurosurgery
- Dermatology
- Pediatric Surgery
- Urology
- Dentistry
- Oncology and Cancers
- Anatomy Videos
- Health and Fitness
- Radiology
- Anaesthesia
- Physical Therapy
- Pharmacology
- Interventional Radiology
- Cardiology
- Endocrinology
- Gynecology
- Emergency Medicine
- Psychiatry and Psychology
- Childbirth Videos
- General Medical Videos
- Nephrology
- Physiology
- Diet and Food Health
- Diabetes Mellitus
- Neurology
- Women Health
- Osteoporosis
- Gastroenterology
- Pulmonology
- Hematology
- Rheumatology
- Toxicology
- Nuclear Medicine
- Infectious Diseases
- Vascular Disease
- Reproductive Health
- Burns and Wound Healing
- Kidney Zone Podcast
- Other
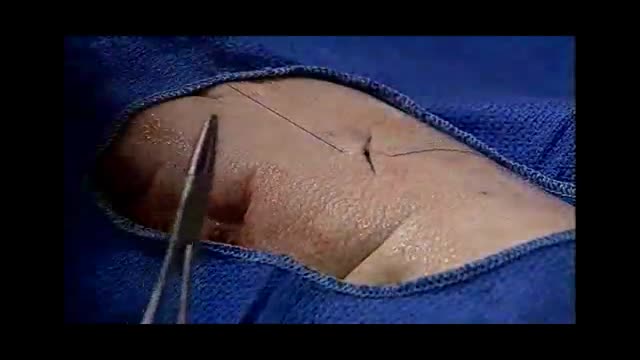


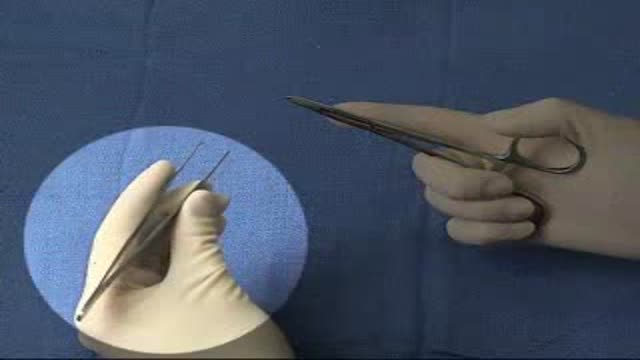

All Suture Techniques Part 1

Educational only: videos on MedicalVideos.com are for general information and are not medical advice. Always consult your own doctor about your health.
If you are a medical student, a resident, a primary care physician or you practice in an emergency department, you can improve your suture skills with this detailed instruction. As you practice towards a cosmetically perfect technique, your confidence will increase, especially when dealing with complex wounds. Areas of study include: methods of closure, closure materials, anesthetics, suture removal, infection, prophylaxis, when to call in a plastic surgeon, recapping techniques and more
This video in 30 seconds
Part 1 of a suturing masterclass by emergency physician Dr. Robert Goldweber. He covers why technique matters for speed, confidence and cosmetic results, then protective equipment and needle safety, the general rules of wound closure, suture materials and sizes by body area, and begins the demonstrations with practice on pig skin.
Key points
- The instructor explains that better suturing skill improves confidence, speed and wound outcomes
- Protective equipment, face protection and safe needle and sharps handling are covered
- General objectives of wound closure include gentle tissue handling and avoiding tension and dead space
- Wound age, foreign bodies, cleaning, closure methods and anesthesia options are discussed
- Suture materials are compared, sizes are matched to body areas, and pig skin is introduced as practice material
Chapters
- 1:29 — Introduction and why technique matters
- 3:01 — Protective equipment and needle safety
- 5:01 — General objectives of wound closure
- 8:18 — Pearls to simplify suturing approach
- 10:47 — Closure methods and anesthesia options
- 13:37 — Suture materials compared
- 15:40 — Suture sizes by body area
- 17:22 — Practice demonstration on pig skin
Key Steps — Suturing technique — principles from a masterclass
A physician-led suturing masterclass. This checklist collects the technique principles it teaches, in the order a repair is performed.
- Protect yourself first: gloves, and facial protection such as a face shield where splashing is possible; consider double-gloving where infection risk is a concern.
- Set up the suture tray the same way every time, with needles parked in one consistent place away from hand traffic — most sharps injuries come from disorganised trays.
- Never recap a needle with a two-handed technique.
- Assess the wound and prepare it before picking up the needle: cleaning, irrigation and anaesthesia come before closure.
- Load the needle correctly: grasp it at the junction of its proximal and middle thirds, at the tip of the needle holder.
- Enter the skin at 90 degrees and drive the needle in a curvilinear path through the tissues by supinating the wrist.
- Take bites of equal width and depth on both sides of the wound, with depth greater than width, so the edges evert as the knot is tied.
- Handle tissue gently with forceps — evert the edge rather than crushing it.
- Tie with an instrument tie: a double first throw (surgeon's knot) to hold tension, followed by single throws in alternating directions.
- Aim for edges approximated, not strangled — and remember the goal the video stresses: a repair that heals with the best possible cosmetic result.
Download the printable Key Steps checklist (PDF)
Steps summarise this demonstration for education. Always follow your institution's protocol. More Wound Care & Dressings skills →
Video Transcript
Part 1 of a suturing masterclass by emergency physician Dr. Robert Goldweber. He covers why technique matters — speed, confidence and cosmetic results — then protective equipment and needle safety, the general rules of wound closure, suture materials and sizes by body area, and begins the demonstrations with the simple interrupted stitch on pig skin.
Read the full transcript
I'm Dr. Robert Goldweber. I'm an associate professor of emergency medicine and a full-time emergency department physician and emergency department residency director at a major metropolitan hospital. I have long been aware of the need and desire of many residents and primary care physicians to improve their suture techniques. There are many reasons why most physicians wish to improve their skills in suturing. Paramount among them is comfort in the knowledge that you as a physician have performed as highly skilled the job as possible for your patient. As your suturing skills improve your
confidence will too, especially as you deal with more increasingly complex wounds. By improving your suturing skills you increase your effective speed of suturing so that when time constraints are a factor you will be able to more effectively treat the wound while dealing with other emergent matters. One of the most important reasons for improving your suturing skills is cosmesis. For your patient's sake you want the results of your treatment to be as cosmetically perfect as possible. The techniques featured in this instruction have been derived from years of medical experience, research and from plastic
surgical teachings. As is common in all areas of medicine, physicians often have differing opinions. Therefore there are considerable variations in suture techniques. I recommend taking time to learn other methods for treating the same problem. We move into actual suture technique. I believe you will find that reviewing parts of this video more than once will be desirable. The first primary objective in wound care is to protect yourself. This includes facial protection. I find the face shield to be the most effective form of protection. Although at times I will use clear plastic goggles I do so only
when there is essentially no chance of splash. Double-gloving is used when a patient has potential for blood-borne infections such as hepatitis or HIV. But note there is argument that one should always double-glove since we may not know or be told the patient's history. The zero wet splash shield is very effective in preventing splashing, protecting both you, the patient and anyone else who might be in the room. The physician has to pay an extreme amount of attention to needles. There are many who disagree with the CDC recommendation that needles should not be recapped on the tray. Obviously
it is of the utmost importance to the physician to avoid accidents with any needles on the suture tray. My recommendation is to develop the habit of putting your needles on the tray in the same place every time. Always be sure they are away from all hand traffic. If you do plan to recap, do not use a two-handed technique. Rather, hold the needle cap in forceps or use one-handed recapping. This markedly decreases the risk of needle stick. Many physicians feel it is safer for all involved to have the needle on
the suture tray capped. But remember that most needle sticks occurred during the recapping process. If you have not yet received the hepatitis B vaccine and you are performing suturing, it is imperative that you be vaccinated against the hepatitis B virus, which is easily transmitted from a needle stick. Once contracted, the risk of death from hepatitis B is equal to or greater than the risk of death resulting from an HIV needle stick. The second primary objective in wound care is to protect others. This requires that you personally dispose of all sharps. Do not put others in the
situation of risking a needle stick because you failed to discard your sharps. Eye splash from your irrigation can be prevented by using the zero wet splash shield. The third objective in wound care is to preserve viable tissue. This requires gentle handling of wound tissue and sharp dissection of the vitalized tissue. The fourth objective is to maximize conditions for wound strength. This includes hemostasis, avoiding dead space and avoidance of tension on the wound. The fifth objective is to restore tissue continuity and function. Sixth is to avoid infection. This requires
an adequate antiseptic technique. The seventh is to minimize scar formation and the eighth and final objective is tetanus prophylaxis. Remember, tetanus toxoid is safe to use in a pregnant patient.
I would like to discuss treatment prior to wound closure. Years ago, many physicians felt that wounds over six hours old or past the so-called golden period should not be sutured because of the increased risk of infection. Over the past several years, the golden period has been lengthening. Some practitioners feel that if a wound is clean and the tissue is healthy appearing, then it is probably acceptable to close that wound up to 24 hours after the injury occurred. I am personally comfortable suturing any 12-hour-old wound that is clean appearing and I frequently go beyond this period of time. For the scalp
area, there may be no golden period so that suturing at just about any time may be acceptable. For older wounds, a delayed primary closure should be considered four to six days after the injury. At that time, if the wound appears uninfected, it should be treated as if it were a recent injury with the briegemont of any divitalized tissue, copious irrigation, and then suturing. Medical legally, a missed foreign body is one of the most frequent causes of lawsuits, though not one of the most expensive. Always consider foreign body X-rays when indicated. Many foreign bodies are radio opaque. This
X-ray demonstrates gravel foreign bodies in a foot laceration. These foreign bodies were removed prior to skin closure. Irrigation removes bacteria, particulate matter, and loose, divitalized tissue. I usually irrigate through the zero-wet splash shield using normal saline. Some physicians use betadine or a betadine normal saline mixture. Some use hydrogen peroxide. Some believe these latter materials may damage tissue. The briegemont involves removing divitalized tissue, thus creating a neat wound. Foreign matter should be removed and, if necessary, sharp dissection used. Proper cleaning, irrigation, and briegemont will help keep the wound infection rate down to
the acceptable 2 to 5%. If wound margins are crushed and divitalized, then these areas should be excised. An elliptical incision is effective for removing areas of crushed, divitalized tissue and for removing lesions. I usually use a number 11 blade and sometimes an iris scissors. For bleeding vessels, a tourniquet is used, but only briefly, in order to obtain a bloodless field and or to tie off a vessel. It is often helpful to have someone lending an extra pair of hands. The grab and tie technique is effective when the vessel
is visualized. If the bleeding vessel is retracted, a figure of eight horizontal mattress suture is effective, particularly in scalp wounds that are bleeding. There are seven so-called pearls that may simplify your approach to certain wound problems. One is that the needle should be large enough to fully penetrate both sides of the wound with one pass. This can cut the time of the suturing process by one-third or more. Two, undermining decreases tension. Using a number 15 blade held parallel to the skin surface to incise the adipose layer or the dermal layer of the wound can make the tension on the
wound much less. This will simplify the suturing process in addition to decreasing the width of the final scar. Iris scissors can also be used. Obviously you have to be very careful to avoid damage to nerves and vessels. Three, the subcutaneous layer. It is always necessary to close off dead space to obtain the least visible scar and to decrease infection rate. I use buried subcutaneous sutures whenever the knot would otherwise be superficial, visible or palpable to the patient such as on the face. Four, for lip lacerations if
the vermilion cutaneous border is involved the first stitch should be placed at that border. Otherwise if you start at one end and you are even a millimeter off the cosmetic result can be poor. Five, usually only one layer of sutures is needed distal to the elbows or the knees unless the wound is gaping or there is muscle involvement. Six, the width of the final scar is directly proportional to the width of the laceration prior to superficial skin closure. This is one of the major reasons why dead space needs to be
closed and subcutaneous sutures are necessary. Seven, for tongue lacerations there is usually little need for sutures if the wound is not gaping and the tongue is not forked. The usual one-half to one centimeter laceration in the middle of the tongue generally heals well with no treatment other than the use of frozen popsicles for comfort. Before beginning to suture the tongue in an uncooperative patient such as a young child after anesthesia is administered it is helpful to put one suture through the very tip of the tongue. This suture is left long and used to hold the tongue out of the mouth while
suturing of the laceration is completed. As demonstrated on this cow's tongue this is a typical forked tongue laceration which requires suturing. If it's not sutured it will result in a permanently forked tongue. There are essentially four methods of closure. The first method involves no closure at all. For example, if a patient suffers a dog bite in the hand and the lacerations are relatively small after anesthesia, debris, and mont and copious irrigation the wounds are usually not sutured because of the increased chance for infection. The second general method of closure
involves the use of proxy strips or sterile strips. These are very effective for superficial non-gaping wounds. The third method is staples. Although these are not used frequently in the primary care setting, they are effective when there is a large long laceration usually on the scalp. These wounds still require anesthesia and irrigation and sometimes subcutaneous sutures prior to the stapling. The fourth method of closure is suturing which I will discuss in detail. Either lidocaine or marquane is used with or without epinephrine. Some physicians add bicarb to decrease the pain of injection usually with 10% to 20% of
the volume as bicarbonate. Many practitioners find this very effective. In my personal experience, I find it moderately effective. In general, lidocaine comes in doses of 1 and 2%. Remember that 10 cc of 2% lidocaine is 200 milligrams so systemic effects can occur. Marquane comes in doses of 0.25% and 0.5%. It is longer lasting usually 6 to 8 hours. The only objection that I have heard voiced by other physicians to using marquane is a delay in the speed of anesthesia. Though I have found no delay whatsoever, in fact a recent
study concurs with that opinion. I inject the anesthetic and begin suturing within seconds with excellent anesthesia. Epinephrine is used to decrease blood flow resulting in a cleaner field. Additionally, because of the decreased blood flow, you obtain longer anesthesia. Epinephrine should not be used with anesthetic of the finger, nose, penis or toes. As you know in these areas, vasoconstriction can result in distal necrosis.
TAC or tetracaine adrenaline cocaine is effective as a local anesthesia for some wounds. The problem is that it takes time to achieve the anesthesia and there is the possibility of systemic effects. A newer TAC gel is being touted as more effective since it stays in the wound without the use of a cotton Pledge. With the gel it is easier to judge the amount of TAC being applied to the wound. 2% viscous xylacane is also effective in decreasing the pain of the injection from the local anesthetic, but several applications are usually
required. Absorbable sutures are made up of polyglycolic acid, vicryl or dexon or of cat gut, chromic or plain. The vicryl and dexon are multi filament and the gut are monofilament. I happen to be very comfortable using vicryl and find it user friendly. It takes several weeks for an absorbable suture to be broken down and absorbed, so if the suture is placed in an area where it might be bothersome such as the inside of the mouth, then the patient should be warned that it is going to be there for some time as it can be removed
just as any suture. Viparapid is a quickly absorbable suture. It's good for non follow up patients. It flakes off in seven to 10 days. Monochryl is a synthetic absorbable monofilament suture. It's good replacement for gut. It's good for subcuticular and intracuticular suturing. Non absorbable sutures exist in multi filament and monofilament types. In the primary care setting, multi filament non absorbable sutures are not generally used. The monofilament non absorbable sutures are the most commonly used. These are proline, ethylon, silk, steel and nylon, along with some other less used types. I
exclusively use proline and find this non absorbable monofilament suture also quite user friendly. Staples are limited to the scalp, trunk or extremities where plastic surgical technique is not necessary. With regard to infection rate, wound healing and patient acceptance, staples are consistent with sutures. The advantage of staples is speed. There is less closure time. It is important to leave the staples in a bit longer than you would sutures due to a potential for decreased wound tensile strength compared with non absorbable sutures. Proxy strips or sterile strips are used for minor wounds
when there is no gaping of the wound and good approximation is easily obtained with the proxy strips or the sterile strips. In general, the smallest size suture material available is used for plastic surgical type closure. For non absorbable sutures for the face, number 6-0 is usually used. For the scalp, either 5-0 or 6-0. This doesn't mean that some physicians don't use 4-0. The reason I use mainly 6-0 proline is that a patient can eventually become bald, so I prefer to leave the patient with as fine a scar as possible. For extremities, use
either 4-0 or 5-0. The 5-0 would be used in an area where there is little movement, if any. Over a joint, 4-0 results in a better stronger suture. On the trunk, for the same reason, use either 4-0 or 5-0. On the breasts, usually 5-0 or 6-0. Absorbable sutures, usually one or two thicknesses larger than the non absorbable sutures are used. So if I use 6-0 proline for superficial closure, I would use 4-0 or 5-0 vicaral for the subcutaneous suturing. Again, you should use the smallest needle possible that will penetrate through both
sides of the wound with one pass. I'm going to start the demonstrations of suturing with the simple interrupted suture. When this is performed, one wants to make sure that the wound is everted so that when you are finished, you actually have a bit of eversion of the wound like this, so that when the sutures are removed, it will eventually flatten out instead of dimpling if it is sutured flat in the beginning. Dimpling results in a bad cosmetic result because of shadowing. To demonstrate the suture techniques, I'm going to
use pig skin. It's excellent for practicing your suturing technique because it is very similar to human skin, both in appearance and in texture and also the thickness. With an interrupted simple stitch, what you want to do is
Transcript auto-generated from the video’s audio for accessibility and study. Educational content only — not medical advice.
Medical Videos
Free medical and surgery videos for patients, students and professionals — trusted since 2007.
Founded by Dr. Mohamed Ibrahim, MD, PhD — physician-scientist.
Follow us on Facebook · Instagram
SORT BY-
Top Comments
-
Latest comments