
- Physical Examination
- Surgical Examination
- Ophthalmology
- Clinical Skills
- Orthopedics
- Surgery Videos
- Laparoscopy
- Pediatrics
- Funny Videos
- Cardiothoracic Surgery
- Nursing Videos
- Plastic Surgery
- Otorhinolaryngology
- Histology and Histopathology
- Neurosurgery
- Dermatology
- Pediatric Surgery
- Urology
- Dentistry
- Oncology and Cancers
- Anatomy Videos
- Health and Fitness
- Radiology
- Anaesthesia
- Physical Therapy
- Pharmacology
- Interventional Radiology
- Cardiology
- Endocrinology
- Gynecology
- Emergency Medicine
- Psychiatry and Psychology
- Childbirth Videos
- General Medical Videos
- Nephrology
- Physiology
- Diet and Food Health
- Diabetes Mellitus
- Neurology
- Women Health
- Osteoporosis
- Gastroenterology
- Pulmonology
- Hematology
- Rheumatology
- Toxicology
- Nuclear Medicine
- Infectious Diseases
- Vascular Disease
- Reproductive Health
- Burns and Wound Healing
- Kidney Zone Podcast
- Other






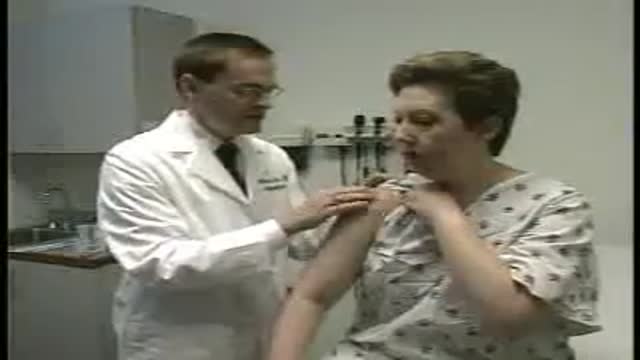




Pediatric Head-to-Toe Assessment

Educational only: videos on MedicalVideos.com are for general information and are not medical advice. Always consult your own doctor about your health.
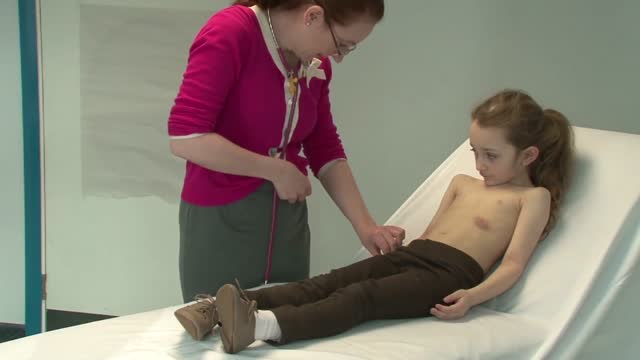
A complete head-to-toe assessment of a pediatric patient is presented in this teaching video, following the Bates visual guide format used in clinical training. It works through each body system in examination order. A study resource for students learning pediatric examination. Educational only — not medical advice.
This video in 30 seconds
A long formal training film demonstrates head-to-toe assessment of infants, using a healthy infant as the example. It presents an efficient examination sequence that stays flexible around the baby cooperation, covering vital signs, skin, eyes, ears, chest, abdomen, and reflexes, and returning at the end to anything deferred.
Key points
- The film contrasts infant examination with assessment of older children and adults
- An examination sequence designed to minimise disruption to the baby is presented
- Growth and vital signs are compared with normal values for age
- Breathing, heart sounds, and abdominal findings are demonstrated in sequence
- Primitive reflexes and cranial nerve checks for infants are demonstrated, and the examiner returns at the end to deferred items such as the ear examination
Chapters
- 0:24 — Introduction to infant assessment
- 4:39 — Examination sequence overview
- 10:51 — Skin and head examination
- 17:10 — Hearing and ear examination
- 20:17 — Respiratory assessment
- 26:36 — Abdominal examination
- 32:57 — Reflexes and nervous system
- 39:52 — Returning to deferred items
Key Steps — Paediatric head-to-toe assessment (infant)
A teaching film on examining infants, contrasted with adult examination. Flexibility is its central lesson: keep the sequence systematic, but adapt the order to the baby's cooperation.
- Set up for safety first: in practice the examination table sits flush against the wall so the infant cannot fall, and the parent stays present throughout.
- Time the examination when the infant is most responsive — typically one to two hours after a feed, neither drowsy with fullness nor agitated with hunger.
- Begin by observing before touching: general appearance, colour, posture, spontaneous movement, and how the parent and baby interact — and use the moment to teach the parents what you are seeing.
- Stay flexible: take opportunities as they come. If the baby is quiet, listen to the heart, lungs and abdomen first, before anything that will cause crying.
- Measure and record growth and vital signs: temperature, heart rate, respiratory rate, weight, length and head circumference.
- Work systematically through the systems — head and neck, chest, abdomen, hips and limbs, skin — comparing with what is normal at this developmental stage.
- Check tone, reflexes and responses as part of the neurological picture.
- Leave the most upsetting parts — typically ears and throat — until last.
- Finish by settling the baby with the parent, summarising findings for them, and documenting the complete assessment.
Steps summarise this demonstration for education. Always follow your institution's protocol. More Monitoring & Assessment skills →
Video Transcript
A long, formal training film — over forty minutes — on head-to-toe assessment of infants. It demonstrates an efficient examination sequence that stays flexible around the baby's cooperation, covering observation of breathing, auscultation, developmental milestones, and returning at the end to anything deferred, such as the ear examination or reflexes.
Read the full transcript
This video introduces the proper techniques for head-to-toe assessment of infants. Using demonstrations, along with comparison to head-to-toe assessment of adults, the video highlights the need for thorough knowledge of examination techniques appropriate to each area of the body. It also demonstrates an efficient sequence of examination while acknowledging the need for flexibility in response to the infant's level of cooperation. You'll see the examiner assess a healthy infant. In clinical practice, the head-to-toe examination may reveal normal findings or variations, or you may discover abnormal findings. For safety reasons, it is recommended that pediatric examination tables be placed flush against the examination room wall.
For the instructional purposes of this video, we are positioning the examination table away from the wall temporarily to provide for the clearest demonstration of examination techniques. The examination of infants differs from examinations of older children in several important ways, and differs from adult examinations even more. You will find that the infant's level of development affects his or her degree of cooperation. Therefore, you must remain flexible in your approach while ensuring that both the order and the style of your examination are appropriate to the situation. To respond with flexibility, you must become thoroughly familiar with all aspects of the examination
and understand how its various steps are interrelated. Unlike with older children, opportunities to engage the infant and encourage his or her cooperation are extremely limited. You can increase the chances of obtaining cooperation by considering the following tips. Try to examine infants one to two hours after feeding when they are most responsive. At this time, they are neither too satiated, which makes them less responsive, nor too hungry, which makes them agitated. Examine the infant in the presence of the parents. While this can be intimidating to even veteran examiners,
parents often can help to calm a restless or screaming baby. Take advantage of such opportunities also to teach parents about their baby's natural abilities and to help them interpret the infant's nonverbal cues. Observe the parent's interaction with the baby, their bonding or their behavior during feeding, for example. Doing so gives you a chance to assess parenting strengths and to advise or instruct the parents regarding observed weaknesses. Start with the infant swaddled and comfortable. Then, as the examination proceeds, unrest the infant in stages to ensure gradual stimulation and arousal.
Observe transitions as the baby arouses and teach parents about them. For example, infants are often fussy during transitions. Encourage the baby's eyes to open by dimming the lights and rocking the baby or placing the baby on a parent's shoulder. Employ calming maneuvers if the baby becomes agitated. Provide a pacifier or, if the baby is not breastfeeding, a bottle of formula or allow the baby to suck on your gloved finger or the baby's own hand. Also try re-swaddling to silence the infant long enough to complete the parts of the examination that require a quiet baby.
Mastering the techniques of the infant examination takes time, but is achievable with practice and experience. Over time, you will achieve more than just technical proficiency. You will come to understand and exemplify that hallowed medical expression, the art of medicine. In general, you will perform non-disturbing maneuvers early in the examination and potentially distressing maneuvers near the end. A typical sequence of examination that leads to minimal disruption of the baby consists of the following steps. Begin the assessment with a general survey, inspecting the patient closely, literally from head to toe
in order to form impressions for your later written assessment. Follow the general survey with an assessment of somatic growth, including height, weight, and head circumference. Then, progress through vital signs, skin, which you should observe as you go along, head and neck, and the ears, whenever they are spontaneously open. Ears and nose, mouth and pharynx, thorax and lungs, cardiovascular system, breasts, abdomen, genitalia and rectum, the musculoskeletal system, the nervous system, and finally, the otoscopic examination of the ears. During the general survey, you will observe the quality of parent-child interactions
and parental discipline. You will also look for signs of stress or depression in parents, which may place the child at risk and sometimes can indicate an increased risk for child abuse or neglect. You will observe how the infant performs simple developmental tasks, such as seeing, hearing, and smiling. You will also note signs of the infant's strength and symmetry of movement, as well as unique and individual characteristics, such as skin markings and facial features. Growth is one of the most important indicators of a child's health, and deviations from normal may be an early sign of an underlying problem.
When assessing growth, compare your findings with normal values according to the child's age and sex. In the first year of life, you will also adjust for gestational age. The most important tools for assessing somatic growth are growth charts. Growth charts display a series of lines that enable you to establish percentile rankings for your patients, indicating their growth relative to other children of the same chronologic age. For the best trends, plot patients' growth parameters over time. For the infant, height is measured as body length. Direct measurement using a tape measure is inaccurate.
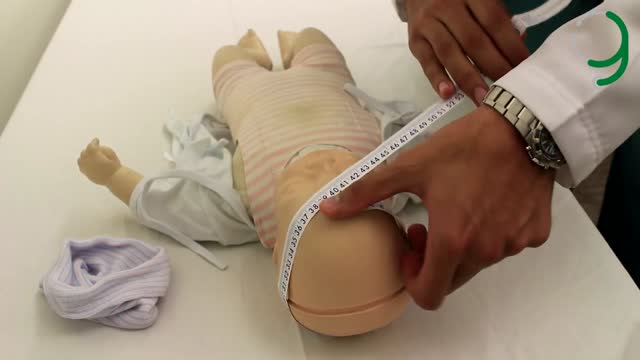
For a more accurate measurement, place the baby's supine on a measuring board or tray. Holding the patient still with hips and knees fully extended. Weigh infants directly with an infant scale. Infants should be naked or clothed only in a diaper, in which case the diaper should be weighed separately, and that weight subtracted from the overall measurement. Head circumference in infants reflects the rate of growth of the cranium and the brain. Place the measuring tape over the occipital, parietal, and frontal prominences to obtain the maximum circumference. Let's see if you put them right up here. We'll just check them by opening.
For infants, you'll measure pulse, respiratory rate, blood pressure, and temperature. You may have trouble obtaining an accurate pulse rate in squirming infants. The best strategy is to palpate either the femoral arteries in the inguinal area, or the brachial arteries in the adicubital fossa, or to oscultate the heart. The respiratory rate in infants has a greater range compared to adults, and in fact, may vary considerably from moment to moment, with alternating periods of rapid and slow breathing. Ideally, the respiratory pattern should be observed for 60 seconds, or at least for 30 seconds, multiplying the number of breaths by two,
to note the rate per minute. In infants, the normal rate ranges between 30 and 60 breaths per minute. While blood pressure is routinely measured in children older than two years, it should also be obtained from infants whenever possible. Although in younger infants, the clinician faces special challenges. Select a blood pressure cuff as you would in adults. It should be wide enough to cover two-thirds of the upper arm or leg. In infants, selecting the proper size cuff is critical. Rectal temperature readings are preferred over auditory canal readings
for the most accurate assessment of sick infants. Because clinical guidelines for evaluating serious bacterial infections use rectal temperature levels as a major criterion. Auditory temperatures are acceptable for the normal examination of healthy infants. Place the infant or child prone on the examining table, on the parent's lamp, or on your own lamp. While you separate the buttocks with the thumb and forefinger of one hand, use the other hand to gently insert a well-lubricated rectal thermometer. Incline approximately 20 degrees from table or lamp through the anal sphincter to a depth of approximately 2 to 3 centimeters.
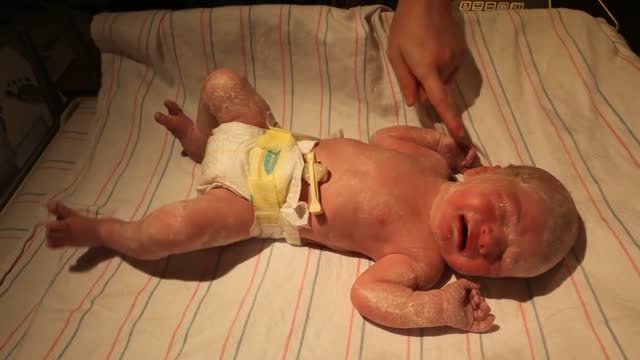
Keep the thermometer in place for at least two minutes. The average rectal temperature is higher in infancy than in adulthood, usually not falling below 99 degrees Fahrenheit until after three years, and they fluctuate as much as three degrees during a single day. As you proceed through the examination, add as opportunity arises, examine the skin of the infant carefully, first for texture and appearance. In infants, the texture is soft and smooth because it is thinner than the skin of older children. Observe also for various common skin conditions and rashes,
including vernexcaeosa, edema, milia, miliaria rubra, erythema toxicum, and postular melanosis. Note any birthmarks in the infant, and palpate to assess the degree of hydration, or turgor. Roll a fold of loosely adherent skin between your thumb and forefinger to determine its consistency. In well-hydrated infants, the skin returns to its normal position immediately upon release. Normal physiologic jaundice occurs in half of all infants, appearing on the second or third day of life, peaking at about the fifth day, and usually disappearing within one week. Pressing the red color from the skin allows better recognition of the yellow of jaundice.
This infant displays no sign of jaundice. The bones of the skull are separated from one another by membranous tissue spaces called sutures. The areas where the major sutures intersect in the anterior and posterior portions of the skull are known as fontanelles. Palpate the sutures and fontanelles carefully with the baby sitting quietly or being held upright. The fullness of the fontanelles reflects intracranial pressure. On palpation, the sutures feel like ridges and the fontanelles like soft concavities. You may feel or see pulsations in the anterior fontanelle as a normal finding.
Assess the symmetry of the skull. Several conditions can cause asymmetry of the skull in newborns and infants. Some are normal or benign, while others reflect underlying pathology. Next, carefully examine the face of the infant. Look for symmetry. Then concentrate on forming an overall impression of the fasces. It is often helpful to compare the face of the baby with the face of the parent. Then try to determine whether the facial features fit a recognizable syndrome. Begin examination of the infant's neck by palpating. Because the necks of infants are short, it is best to palpate them with the infant's supine.
In infants, the lymph nodes are usually not palpable. However, palpation will help reveal any additional masses, such as congenital cysts, including fibroglossal duct cysts, brachial cleft cysts, or cystic hygromas. Next, check the position of the thyroid cartilage and trachea. Check for neck mobility, ensuring that the neck is supple and easily mobile in all directions. This is particularly important when the infant is holding the head asymmetrically, and when central nervous system disorders, such as meningitis, are suspected. In newborns and infants, nuclear rigidity is a more reliable indicator of meningial irritation
than is Brzezinski's sign or Kearney's sign. Finally, palpate the clavicles and look for evidence of fracture. When assessing the infant's eyes, use subdued lighting, because bright light causes infants to blink. Newborns keep their eyes closed except during brief awake periods. If you attempt to separate their eyelids, they'll tighten them even more. The best way to encourage infants to open their eyes is to awaken them gently in subdued light and support them in a sitting position. During the first few months of life, some infants have intermittent crossed eyes
or intermittent laterally deviated eyes. If the baby is awake, you can examine the contractivy by retracting the eyelids.
Look for abnormalities or congenital problems in his sclerae and pupils. Subcontractival hemorrhages are common in newborns and remain bright red until the resolve in a few weeks. By one month of age, an infant should be able to fix on objects such as your face and follow a bright light provided you catch the baby during an alert period. Pucillary reactions can be observed either by response to light or by covering each of the infant's eyes with your hand and then uncovering them. Then try to use your ophthalmoscope to examine the red reflex.
Failure to see a red or orange reflex may indicate an abnormality. 10 to 12 inches away is a good place to start. Back away if you're having trouble seeing the red color. Refocus the diopters to plus 15 to better see a possible cataract. When examining infants' ears, the major goals are to determine if the position, shape, and features are normal. And to detect abnormalities. Note the position of the ears in relation to the eyes. An imaginary line drawn across the inner and outer canthi of the eyes should cross the pinna or oracle.
If the pinna is below this line then the infant has low set ears. While this may be normal, it may also be a sign of a congenital syndrome. Look for skin tags, clefts, or pits in the tragus of the ear. These findings sometimes are associated with other congenital deformities. Test for hearing using the startle reflex. Make a sharp noise and observe the startle response and the acoustic blink response. If, as shown here, the child does not respond to a clap, you may also test hearing by observing the child's response to a soothing voice.
The otoscopic examination should be left until the end of the examination, because it may be uncomfortable for the infant. During the first few weeks of life, the otoscopic examination is difficult and may detect only patency of the ear canal because of birth material in the canal. It is also invisible that to panic membrane at this age is dull and more opaque than in older children, making middle ear assessment difficult. You will need the otoscope at this point to inspect the nose. Use a wide speculum and ensure that the nasal septum is midline.
Test patency of the nasal passages by gently occluding each nostril alternately. Because infants are nasal breathers, they should easily tolerate this gentle maneuver. Do not occlude both nostrils at once however, which would cause considerable stress. Inspection of the mouth and pharynx of infants is usually best accomplished while the child is crying. Use inspection with a flashlight as well as palpation. You will notice that newborns have no teeth, but they may have small pearl-like cysts called Epstein's pearls along the alveolar ridges or centrally on the hard palate.
Epstein's pearls disappear within one or two months. You will often see a whitish covering on the tongue. If this coating has been caused by milk, it can easily be removed by scraping or wiping it away. Try to distinguish milk from thrush, which is also commonly seen on the buckle and gingival surfaces. When attempting to examine the pharynx, you will likely have difficulty using a tongue blade because it produces a strong gag reflex. Do not expect to be able to visualize the tonsils. Carefully assess respirations and pattern of breathing.
An important tip is not to rush to the stethoscope, but rather to observe the infant carefully. You can note several important aspects of the respiratory examination simply by observation, including respiratory rate, color, nasal component of breathing, and audible breath sounds, including nasal flaring, grunting, or retractions, also known as chest in-drawing. Chest in-drawing is the inward movement of the ribs during inspiration. Any of these signs of work when breathing indicate respiratory pathology. Percussion is not helpful in the examination of the chest of infants, as the infant's chest is hyper-resonant throughout.
Next, begin auscultation. Breath sounds are louder and harsher in infants than in adults because the stethoscope is closer to the origin of the sounds. Also, it is often difficult to distinguish transmitted upper airway sounds from sounds originating in the chest. Hold your stethoscope in front of the infant's nose and compare the quality of sounds. Also, compare the loudness of the sounds as you move the stethoscope further down the chest. As with adults, note the symmetry of breath sounds from right to left. The sounds transmitted from the upper airway become quieter.
Note whether any sounds are inspiratory or expiratory. Expiratory sounds are generally from an intrathoracic source, while inspiratory sounds can be either from the chest or from the upper airway or nose. Sounds are transmitted loudly throughout the infant's small chest. Nevertheless, the characteristics of the breath sounds, such as crackles, wheezes, and ronkai, are the same as those for adults. Wheezes, ronkai, and what crackles are commonly heard in the chests of infants. They commonly result from various lung infections and much less commonly from cardiac disease. Carefully observe the skin for cyanosis.
The best place to ensure that the infant is pink is to look in the mouth. A true pink, the color of a strawberry, is normal, while cyanosis appears more like the deeper red of a raspberry. You already observe the infant's respiratory rate. This is an important component of the cardiac examination as well, because peaceful tachypnea often accompanies heart disease. Palpate the peripheral pulses. This is particularly challenging in squirmy, chubby infants. The brachial artery pulse and the adicubital fossa is easier to feel than the radial pulse at the wrist.
It is also important to feel the quality of the femoral pulses to rule out co-arctation of the aorta. The femoral pulses lie in the midline just below the inguinal crease between the iliac crest and the symphysis pubis. Take your time when palpating the femoral pulses. One trick is to flex the infant's thighs. The infant will likely stretch them out a bit and allow you to palpate in the inguinal canal. You should also try to palpate the dorsalis pedis and posterior tibial pulses, although these may be difficult to feel.
The point of maximal impulse is often not palpable in infants. Next, place your hand on the chest to feel for thrills, which are quite rare in infants. Oscultate using the diaphragm of your cephoscope in all areas, including the second right interspace, or aortic area, the second left interspace, or pulmonic area, the left lower sternal border, or right ventricular area, and the apex, or left ventricular area. While the specific order is not critical, it is important to oscillate in all areas. Listening carefully for S1, S2, S3, or S4, and any murmurs.
Now repeat using the bell of your stethoscope. Infants commonly have premature atrial or ventricular beats that sound like skipped beats. These will usually go away when the infant cries and the heart rate increases. If you can oscillate while the infant is very quiet, you should be able to detect the splitting of the second heart sound, or S2. Detecting this split eliminates many serious congenital cardiac defects. Third heart sounds are low-pitched, early diastolic sounds commonly heard in infants. They reflect rapid ventricular filling and not disease. You might even hear a gallop in the presence of a normal rate and rhythm.
This is normal in infants. Remember that infants breathe rapidly, so you will need to mentally subtract the sounds of respiration from the heart sounds. Listen for the intensity of the second heart sounds. Listen for systolic or diastolic murmurs, as well as third heart sounds. Fourth heart sounds are rare in newborns. Listen carefully for heart murmurs in the axillae and also in the back to help you identify pulmonic murmurs. The breasts of both a male and female newborn are often enlarged as a result of the effects of maternal estrogen.
Such enlargement may last several months. The breasts also may be engorged with a white liquid, sometimes colloquially called witch's milk. This finding may last for the first week or two of life. You will find it easy to examine the abdomen of infants because they love to be touched. Inspect the abdomen with a baby-lying supine. First observe the shape and symmetry of the abdomen, as well as the umbilicus. In young infants, look for redness or swelling around the umbilicus. You may notice a diastasis recti in many normal infants.
This is the separation of the two rectus abdominis muscles, causing a midline ridge, especially on contraction of the abdominal muscles. As in adults, auscultate the abdomen prior to palpation. Don't be surprised if you hear an orchestra of musical, tinkling bowel sounds. A useful technique to relax the infant is to hold the legs flexed at the knees and hips with one hand, while palpating the abdomen with the other. You may also want to request assistance from a parent, or use a pacifier or a bottle to quiet the infant in this position.
Start gently palpating the liver and infants low in the abdomen, moving upwards with your fingers. This technique helps you avoid missing an extremely enlarged liver that extends down into the pelvis. With a careful examination, you can feel the liver edge in most infants 1 to 2 centimeters below the right costal margin. Similarly, you can usually palpate the spleen tip. In fact, you may be able to palpate the kidneys of infants by carefully placing the fingers of one hand in front of, and those of the other hand behind each kidney.
In examination of the infant male genitalia with inspection, with the infant supine, note the appearance of the penis, testes, and scrotum. Then, unless the infant's penis has been circumcised, examine the foreskin. Note that the foreskin of infants cannot usually be retracted. Examine the penis, noting abnormalities. Make sure the penis is straight. Examine the scrotum and testes, making sure you can feel both testes. Note any swelling within the scrotal sac. In the newborn female, the genitalia will be prominent as a result of the effects of maternal estrogen.
The labia majora and menorah have a dull pink color in light-skinned infants, and may be hyperpigmented in dark-skinned infants. The hormonal membrane of newborns is thickened and may have tags projecting out. Familiarizing yourself with the appearance of the genitalia at different ages will help you recognize normal variations from subtle abnormalities. For infants, the rectal examination consists of visual inspection of the anus. Digital examination is not routinely performed unless pathology is suspected. Much of the musculoskeletal examination focuses on detection of congenital abnormalities, particularly in the hands, spine, hips, legs, and feet.
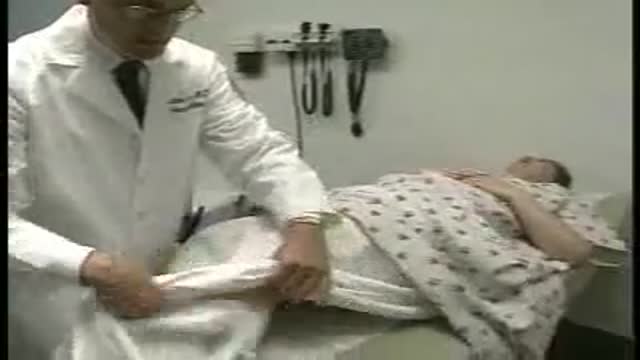
With a little practice, you will be able to combine the musculoskeletal examination with the developmental and nervous system examinations. The infant's hands are clenched because of the plomar grip reflex. You will need to help the infant extend the fingers. Inspect the hands, fingers, and elbows carefully, noting any defects. Examine the infant's hips carefully for signs of dislocation. Two techniques are especially helpful. For the Barlow test, hold the legs as shown and rotate your hands outward, seeing if the femoral head feels stable or moves laterally. Movement of the femoral head signifies laxity and a dislocatable hip.
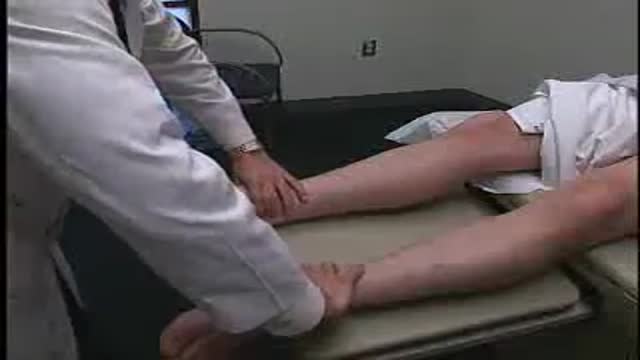
For the Ortolani test, again, hold the legs as shown and rotate your hands the other way, inward, until each knee touches the table. A palpable movement of the femoral head back into place is abnormal. It is important to examine the legs and feet to detect developmental abnormalities. Assess symmetry, bowing, and torsion of the legs. There should be no discrepancy in leg length. Some normal infants exhibit twisting or torsion of the tibia, inwardly or outwardly, on the longitudinal axis. Parents may be concerned about towing in or towing out of the foot at an awkward gait, all of which are usually normal.
Tibial torsion corrects itself during the second year of life, after months of weight bearing. Finally, examine the feet of the infant. At birth, the feet may appear deformed from retaining intrauterine positioning, often being turned inward. Manipulate the affected foot. A normal foot should be easy to correct to the neutral and even to an overcorrected position. You can sometimes scratch or stroke along the outer edge of the foot to see if it assumes a normal position. The normal infant's foot has several features that, while they may initially concern you, are benign.
The foot appears flat because of a plantar fat pad. There is often inversion of the foot, elevating the medial margin. The infant may exhibit adduction of the forefoot without inversion, or even adduction of the entire foot. Each of these normal variants tends to resolve within one or two years. Finally, inspect the spine carefully, making sure there are no pigmented spots, hairy patches, or pits. The examination of the nervous system in infants includes techniques specific to their particular age. It is highly dependent on several factors. Internal factors affecting findings include alertness and timing with respect to feeding and sleeping.
External factors affecting findings include the presence of parents or the presence of fearful stimuli. Primitive reflexes are present only at certain ages and then disappear. Neurologic changes often present as developmental abnormalities. For this reason, neurologic and developmental examinations often are combined. Assess the mental status of infants during alert periods. If the baby is transiently too drowsy, return at a later time. First, assess motor tone by carefully watching the infant's position at rest, and then testing resistance to passive movement. Assess tone as you move each major joint through its range of motion.
Noting any spasticity or flacidity. Hold the baby in your hands to determine if the tone is normal, increased, or decreased for age. You can test for the infant's sensory function only in a limited way. Test for pain sensation by flicking the infant's palm or soul with your finger. Observe for withdrawal or rousal and change in facial expression. Do not use a pin to test for pain. Testing in infant's cranial nerves requires special methods that differ from those used for older patients. Cranial nerve 1, which mediates sense of smell, is difficult to test in infants.
Cranial nerve 2 mediates vision. Cranial nerve 2 can be tested by having the baby regard your face. Look for facial response and tracking. Cranial nerves 2 and 3 control response to light. To test, raise the baby to a sitting position to open the eyes. Use a light and test for optic blink reflex. You may also use the otoscope without a speculum to assess pupillary response. Cranial nerves 3, 4 and 6 mediate extraocular movement. These nerves can be tested by observing tracking as the infant regards your smiling face moving side to side.
Use a light or a toy without sound for this test if necessary. The motor portion of cranial nerve 5 innervates the muscles of mastication, while the sensory portion mediates facial sensation and the sensory part of the corneal reflex. Cranial nerve 5 can be assessed by testing the rooting reflex and the sucking reflex. Cranial nerve 7 innervates all muscles of facial movement and expression. Cranial nerve 7 should be assessed by observing the baby crying and smiling, while you note symmetry of the face and forehead. Cranial nerve 8 mediates hearing and vestibular function.
Cranial nerve 8 may be assessed by testing acoustic blink reflex and tracking in response to sound. Cranial nerves 9 and 10 mediate the sensory and motor functions of the palate, pharynx and larynx. These nerves are assessed by observing the infant's coordination during swallowing. Cranial nerve 11 innervates the sternum mastoid muscles and upper trapezius muscles. Cranial nerve 11 is assessed by observing the symmetry of the infant's shoulders. Cranial nerve 12 mediates motor functions of the tongue, affecting articulation of words. Observe coordination of swallowing, sucking and tongue thrusting.
The deep tendon reflexes are variable in newborns and infants, because the corticospinal pathways are not fully developed. Thus their exaggerated presence or their absence has little diagnostic significance, unless this response is different from results of previous testing, or unless extreme responses are observed. To elicit deep tendon reflexes of the biceps and quadriceps, use the same techniques as you would for an adult, substituting your index or middle fingers for the neurologic hammer. However, the triceps, brachioradialis and abdominal reflexes are difficult to elicit before six months of age,
although a normal flexion plantar response is obtained in 90% of infants. A positive Babinski response to plantar stimulation, that is, dorsal flexion of the big toe and fanning of the other toes, can be elicited in some normal infants until two years of age. The infants developing central nervous system can be evaluated by assessing infantile automatisms called primitive reflexes. These developed during gestation are generally demonstrable at birth and disappear at defined ages. A few of the more important primitive reflexes include the palmar grasp reflex. Test for this by placing your fingers into the baby's hands and pressing against the palmar surfaces.
In infants up to three to four months old, the baby should flex all fingers to grasp your fingers. The rooting reflex. Stroke the perioral skin at the corners of the mouth. In infants up to four to six months old, the mouth should open and the baby should turn the head toward the stimulated side and suck. The morrow or startle reflex. Hold the infant's supine, supporting the head, back and legs. Abruptly lower the entire body about two feet. In infants up to four to six months old, the arms should abduct and extend, hands open, or the legs flex.
The infant may cry. Absent primitive reflexes or retention of those reflexes past the usual age they disappear may signify abnormalities. General indicators of central nervous system disease during infancy include abnormal localized neurologic findings, asymmetry of movement of the extremities, failure to elicit expected primitive reflexes, late persistence of primitive reflexes, reemergence of vanished primitive reflexes, delays in reaching any of the following developmental milestones, gross motor, fine motor, cognitive and language, and social and emotional. Before concluding your head to toe examination of the infant, be sure to return to any areas of examination that you had to delay because of lack of patient cooperation,
such as the assessment of the morrow reflexes or the otoscopic examination of the ears. Apply gentle traction on the pinnage toward the back of the head. Hold the otoscope with the handle up between your thumb and first two fingers, resting the pinky and palm against the head. If the baby resists and turns his head toward you, the otoscope will be pushed away rather than inserted too far into the canal. In summary, the head to toe assessment of the infant requires a systematic but flexible sequence of steps,
implemented with full awareness of the unique inherent challenges combined with an approach that minimizes disruption to the patient.
Transcript auto-generated from the video’s audio for accessibility and study. Educational content only — not medical advice.
Video Overview
From our Pediatrics collection: Pediatric videos: child health, newborn care, common childhood illnesses and pediatric procedures explained for parents, students and clinicians. Browse all Pediatrics videos →
SORT BY-
Top Comments
-
Latest comments