
- Physical Examination
- Surgical Examination
- Ophthalmology
- Clinical Skills
- Orthopedics
- Surgery Videos
- Laparoscopy
- Pediatrics
- Funny Videos
- Cardiothoracic Surgery
- Nursing Videos
- Plastic Surgery
- Otorhinolaryngology
- Histology and Histopathology
- Neurosurgery
- Dermatology
- Pediatric Surgery
- Urology
- Dentistry
- Oncology and Cancers
- Anatomy Videos
- Health and Fitness
- Radiology
- Anaesthesia
- Physical Therapy
- Pharmacology
- Interventional Radiology
- Cardiology
- Endocrinology
- Gynecology
- Emergency Medicine
- Psychiatry and Psychology
- Childbirth Videos
- General Medical Videos
- Nephrology
- Physiology
- Diet and Food Health
- Diabetes Mellitus
- Neurology
- Women Health
- Osteoporosis
- Gastroenterology
- Pulmonology
- Hematology
- Rheumatology
- Toxicology
- Nuclear Medicine
- Infectious Diseases
- Vascular Disease
- Reproductive Health
- Burns and Wound Healing
- Kidney Zone Podcast
- Other

















Full Obstetric Examination Part 1

Educational only: videos on MedicalVideos.com are for general information and are not medical advice. Always consult your own doctor about your health.
Full Obstetric examination and normal delivery by Egyptian doctor Hussein Sulayman and the video is in English showing:
Obstetric Examination
Episiotomy
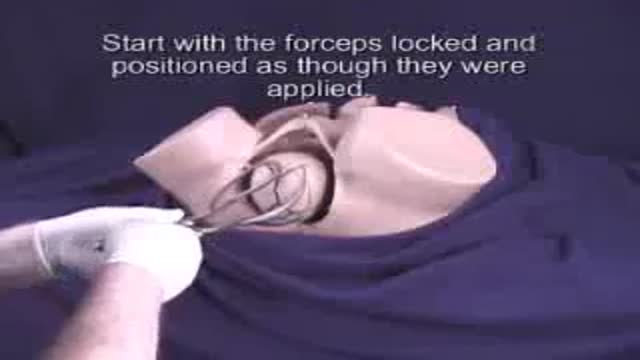
Obstetric Forceps
Obstetric Instruments
This video in 30 seconds
The first part of an Egyptian obstetric teaching film begins with abdominal examination of a pregnant woman, covering lie, presentation, position, the presenting part and the fetal heart sounds, including listening with a Sonicaid device. It then moves through cervical assessment and the mechanism of delivery. The film ends with inspection of the placenta and membranes for completeness.
Key points
- Fetal lie, presentation and position are explained and palpated
- The fetal heart is auscultated over the fetal back
- The cervix is scored for dilation, effacement and consistency
- The movements of the head during delivery are described
- A delivery is shown, and the placenta and membranes are inspected for completeness
Chapters
- 2:32 — Fetal heart and presentation basics
- 5:00 — Abdominal palpation of the fetus
- 13:04 — Listening to the fetal heart
- 18:27 — Scoring the cervix
- 22:22 — How the head is delivered
- 30:05 — Inspecting placenta and membranes
Video Transcript
The first part of an Egyptian obstetric teaching film, from the same series as this catalog's other obstetric tapes. It begins with abdominal examination of the pregnant woman — lie, presentation, position, the presenting part and the fetal heart sounds, including listening with a Sonicaid — and goes on through the delivery material, ending with inspection of the placenta and membranes for completeness.
Read the full transcript
For the sake of science.
For the sake of medicine. For the sake of my young sisters and brothers.
I have the honor to announce the birth of a new project.
Hello, colleagues. Welcome on this film which describes the obstetric procedures and operations. On this film you shall see what is going on at busy obstetric unit. The more you play back this tape, the more you see the obstetric procedures and the more you learn. So when the day comes that you will find yourself confronted with any of these obstetric procedures. You will know where you are and you will know exactly what you are going to do and to manage these cases. We are going to start by abdominal examination of the pregnant woman.
Of course we assume that you have already examined the patient generally. Has taken her blood pressure, have examined her chest, her heart. I have looked before at the lower limbs and now you are coming to examine her abdomen. By abdominal examination you are going to detect the lie, presentation and position of the fetus. You are going to detect the attitude and level of the presenting part and its relationship to the pelvis. You are going to detect the presence and the characters of the fetal heart sounds. Let us see to go now how we examine the pregnant patient.
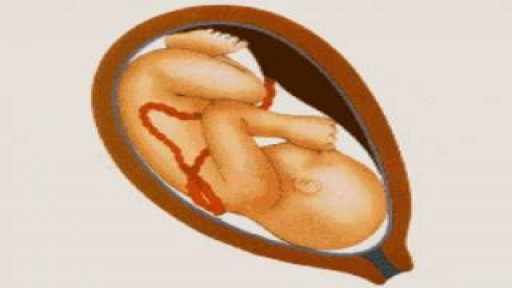
First we can detect whether the fetus is lying longitudinally, transversely inside the abdomen. Second we can detect as well the presentation. However the fetus is presenting by its head or it is presenting by its bridge. Thirdly we can also detect the position of the fetus. When the fetus is presenting by its head we have four positions. The first position what we call left occipital anterior. That means that the back of the fetus as you can see on this picture is on the left side of the mother.
And so as the back is on the left the occiput again is on the left. Because the occiput is on the same direction as the back. The second position is when the back is on the right side but still anterior. That is why we say right occiput anterior. Again we still refer the occiput on the direction of the back. The third position is the right occipital posterior. Now the back is turned as we can see on this picture is turned to the posterior side or towards the back of the mother.
But it is still on the right side. That is why we call it right occipital posterior. The fourth and last position in the Catholic presentation is the left occipital posterior. That means the back is on the posterior side and is on the left side of the mother. Left occipital posterior. When the baby is presenting by its reach we refer the position to the sacrum. So we have similar positions. Left sacro anterior. Right sacro anterior. Right sacro posterior. And left sacro posterior. Now we come to examine the fetus.
The examination of the fetus is started by doing the fundal palpation or the fundal grip. And with the two hands laid flat upon the fundus of the uterus while you are facing the patient, you should note first the level of the fundus. This will give you an assessment to the period of gestation. Second, you feel the part occupying the fundus which more commonly is a breach and will be felt as a large firm regular grip. A regular body continuous with the trunk of the fetus and moving with it.
If the head occupies the fundus it would be felt as hard, round and palatable when it would be in this position. Then we come to the lateral grip. By the lateral grip we want to estimate and to know where is the back of the fetus. And the back is a smooth rounded surface here. Now I can feel it on the left side of the uterus. And on the other side I can feel knobs or irregularities which confirm the limbs of the fetus here. The third grip we come to the first pelvic grip.
The first pelvic grip is by inserting my hands down here and trying to push and approximate my fingers towards each other. And if the presenting part is engaged that means that the main diameter of the presenting part has passed through the pelvic in it. So my fingers will not approximate to each other. And the presenting part is intervening between my fingers from the left fingers and my right fingers. And this is the first pelvic grip. And it is more important when the presenting part is engaged in the pelvic cavity.
Now when we come to the second pelvic grip and with my hand here on the bubis and then trying to touch the presenting part between the stretched finger and the thumb. Here it is useful when the presenting part is high. And now I can feel the head as hard, round and then ballottable which is high because it is high. So it ballots between my finger and the thumb here. This is the fetal head. By this we can to summarize we can say that this fetus is a longitudinal lie, it's a catholic presentation and it is left occipital anterior position and as the head is not engaged.
This is the conventional fetal stethoscope which is called the pinnald stethoscope which has got a wide mouth here and a narrow opening which fits on the ear. It do come either in metal or in plastic. And this is commonly used to listen for the fetal heart sounds. This is the commonly used sonic aid which is used for listening to the fetal heart sound. As you can see here, so this knob is a switch on and off. This is a battery indicator and then has got a drawer here so we can get its attachment.
This is a plug cord and the plug to be connected to the main whenever we want it to be charged. This knob is fixed here and this is connected to a transducer. This is a KY jelly which is used to paint the abdomen of the patient so it would allow the easy transmission of sound. So we open here and then we can see how the transducer is so sensitive. We shall see now in a minute how it is used clinically. This is another type of fetal sonic aid which is rather small and portable.
It consists of the sonic aid itself just like a small cylinder with a loudspeaker box and its attachments. Now if we can attach this cord to the loudspeaker and this one here, then we open and then we, if we use it we just press on the button. We use on the button so the transducer here will be put on the abdomen and then we transmit the sound. When we release the button so there will be no sound transmitted. By using the loudspeaker, the patient himself can listen to the beats of her own fetus.
The doctor just wants to listen to the fetal heart so we can fix the other attachment here and then we will be used as ordinary stethoscope. Just fixing this to the ear. Now we are going to auscultate the fetal heart. This is the penult stethoscope which we have just seen and have a wide mouth end. In this patient, in our patient, we diagnose that the fetus lying longitudinally with its back on the left side. So the area which we are expecting is on the back, on the scapula and that would be the scapula of the baby.
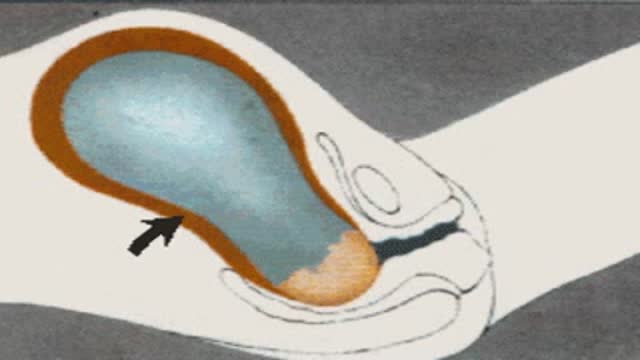
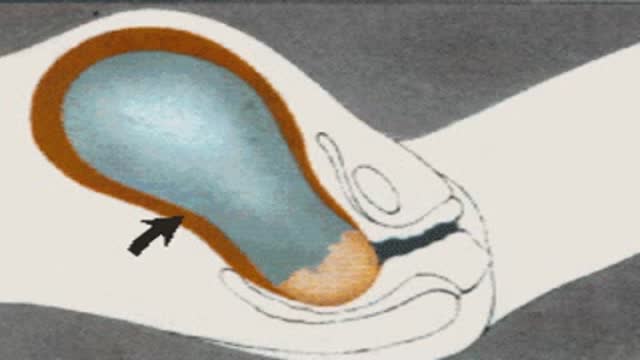
And then the area where we expect to listen to the fetal heart in this case would be here. And if we put the penult stethoscope and then trying to listen, now I can hear the fetal heart regular. And quite audible. In left occipital anterior position, the fetal heart is best heard towards the left iliac fossa as marked on this picture. In right occipital anterior it is towards the right iliac fossa. In posterior positions, the area is further lateral towards the flanks as we can see. When the back of the fetus is extended in posterior positions, this will bring its chest forwards against the anterior uterine wall.
And the fetal heart is best heard towards the midline, an area which is directly over the fetal heart. In bridge positions, the area is further upwards above the umbilical plane. In left occipital anterior it is on the left and in right occipital anterior it is on the right. This is another model of the sonic aid which is different than we have seen. And now we are trying to listen to the fetal heart with the sonic aid. We have to wet the abdomen of the patient with a sound transmitting substance like k-wajjali.
Sometimes we use alcohol and as well as we are going to mob the transducer. And then placing it here, here we can hear. To summarize, we can make a complete diagnosis of the presentation and the position of the fetus from abdominal examination alone. The head in the pelvic brim, that is kefale presentation. The head is flexed, that is vertex presentation. The head is fixed and the greater part of it has passed the pelvic inlet, that means the head is engaged. The back is already felt anterior, that is either on the left side it would be first position or on the right side and it would be the second position.
Or the back cannot be felt, but the limbs are easily felt, that means posterior positions. Now we shall see together what is bent by pelvic scoring. During the last few weeks of pregnancy you will notice certain changes in the cervix as well as changes in the descent of the presenting part. These changes are described and recorded numerically. The changes in the cervix include dilatation, effacement, consistency and position. The changes in the presenting part is referred as station. Kefale evaluation of pelvic score has been made by the journal examination of the cervix and the presenting part.
Analysis of this observation indicates a biorectal relationship between the pelvic scoring and the subsequent date of spontaneous onset of labor. As regards cervical dilatation, when the cervix is dilated less or up to 1 cm, as 0 pelvic score for dilatation is made. When the cervix dilated 1-2 cm, it scores 1. When the cervix is dilated 3-4 cm, it scores 2. A diameter of 5-6 cm of the cervix or more may be reached before the onset of labor, a pelvic score 3 is recorded. As regards effacement, effacement of the cervix is a second factor to be assessed when making a pelvic scoring.
When the cervix is effaced about 30% as your score is made, the 40-50% effaced has occurred as score of 1 is made. Between 60-70%, the score becomes 2. Any cervix is effaced more than 80% will score as 3. As regards station, is the relationship between the foremost area of the presenting part and the level of the ischial spine. For the papers of pelvic scoring, it is estimated by the obstetrician in cm above or below the plane of the ischial spine. A head-felt 3 cm above the ischial spine scores 0.
2 cm above scores 1. As it descends, engagement occurs and scores 2. Further descent scores as 3. As regards consistency of the cervix, is next estimated. Firm cervix is recorded as 0. As progressive softening occurs, is recorded 1 or 2. As regards the position in which the cervix is placed in relation to the axis of the birth canal completes the 5 factors of pelvic scoring. Posterior position gives 0 scoring. When the cervix is in mid position, it is 1 and tier position scores 2. As pregnancy proceeds, the scores in various columns change and the total pelvic score rises.
As the score is 1, is recorded, the average time lapse before the patient goes into labor is 20 days. When the score goes up to 5, the time lapse is 9 days. Score 9 or more, almost all patients will be delivered within one week. The delivery is conducted. I just want to emphasize that delivery of the baby goes into 3 stages. The first stage is preparatory. Where the lower segment of the uterus is formed, the cervix starts to dilate as when as starts to thin out the condition we call it a facement or taking up of the cervix.
This stage is when the cervix has completely disappeared and the birth canal becomes one tube, comprises the uterus, the cervix as well as the vagina. Then the second stage starts which comprises the delivery of the baby. The most difficult part in delivery of the baby is the head. Once it is delivered, in majority of cases the body will follow straight away. The fetal head during its delivery goes through consequent movements during its labor. First, flexion. If it hasn't been already flexed, then internal rotation, then it will be delivered by extension.
Once the head is delivered out, then it returns its original position, a process we mentioned, restitution. Then when the shoulders come to the pelvic floor, they rotate. This will be reflected to the head as external rotation. All these movements are accompanied by descent of the head. Let us see together how normal delivery is conducted. As the fetal head begins to show, the situation is that the head is well flexed and ready to pass out the pubic symphysis. Internal rotation has taken place. From below, the fetal head lies with a surgical suture in the antoposture diameter of the pelvic outlet and is occipital anterior.
Then we swab the vulva and then here we assist in normal delivery. The head should remain well flexed to allow the smallest diameter, the sub-oxibitobragmatic diameter to pass through the entroitus. As the head continues to advance, it passes under the symphysis pubis to the position of crowning when the widest diameter is at the entroitus. Now extension of the head occurs to sweep the face over the perineum and the head is completely delivered. The shoulders now lie in the right oblique diameter and once the head rotates in the movement known as restitution,
the shoulder reaches the pelvic floor and rotates into the antoposture diameter, carrying the head with it to complete movement of external rotation. Here it is as we can see. This is the patient and we are conducting her normal delivery. We are going now to do infiltration at the site of the episiotomy with the liginokane 1%. As we can see, we inserted the needle at the site of the episiotomy with the scissors here. There's the episiotomy away from the midline. As we can see, we'll be extended to bring the face over the perineum.
At the same time, we are supporting the perineum with the left hand slowly. Now the face is out as we can see. Then we swap the baby's eyes. Now we assist the process of restitution. Here you can see the head has restituted itself in the left occipital anterior position. Restitution now occurs followed by external rotation of the occiput. As the shoulder is now in a position, we see the anterior shoulder lying under the synpses and the posterior shoulder lying against the perineum. Gentle interaction on the head towards the anus will assist the anterior shoulder to pass under the synpses.
Then gentle interaction anteriorly will bring the posterior shoulder over the perineum. For the rest of the baby is delivered, there will be a lateral flexion of the trunk over the mother's abdomen continuing the curve of the birth canal. Here on the patient again, we are lifting the baby to deliver the posterior shoulder. Here then the rest of the baby. Here it is. Now whereby a mucous circle or a catheter, we suck the nasopharynx of the baby and our assistant is tying its umbilical cord. Now the baby has been delivered.
The third stage of labor is commenced and this includes the delivery of the afterbirth or the placenta. Immediately following the birth of the baby, the uterus contracts to the level of the umbilinus and a bit of placenta is shelled off. In this process, the blood sinuses are torn and bleeding occurs behind the placenta. Subsequent uterine interactions will push the placenta in the lower segment then into the vagina with the retracting uterus on top. Putting the umbilins off behind it and determining them inside out. The crisscross fibers of the uterine muscles which surround the blood sinuses retract
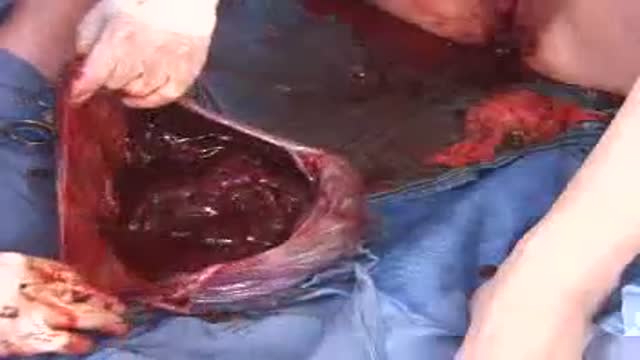
as in third stage proceeds and close up the sinuses. This is described as Schultz's mechanism of spontaneous delivery of the placenta. Now this is the placenta showing here by spontaneous delivery and then by gentle interaction on the cord that we can see the placenta is coming out a gentle fundal pression will assist the delivery of the placenta. Once the placenta is out, then we'll hold it and then twisting the sac of membranes like that so it would come in one go. When the placenta is out, so we have to respect the placenta and this is the sac.
We inverted the amniotic sac and then we see the placenta with the cotididons is complete. There's nothing missing. The placenta is retained for over half an hour.
Transcript auto-generated from the video’s audio for accessibility and study. Educational content only — not medical advice.
Video Overview
From our Gynecology collection: Pelvic exams, Pap smears, IUD insertion, hysteroscopy and women's health procedures explained step by step. Browse all Gynecology videos →
Medical Videos
Free medical and surgery videos for patients, students and professionals — trusted since 2007.
Founded by Dr. Mohamed Ibrahim, MD, PhD — physician-scientist.
Follow us on Facebook · Instagram
SORT BY-
Top Comments
-
Latest comments