
- Procedures & Tests
- Symptoms A-Z
- Symptom Checker
- Kidney Diet
- First Aid
- Anatomy Atlas
- Ask MedicalVideos
- Drug Guide
- Lab Values
- Vital Signs
- Muscles A–Z
- Clinical Signs
- Medical Abbreviations
- Medical Terminology
- Physical Examination
- Surgical Examination
- Ophthalmology
- Clinical Skills
- Orthopedics
- Surgery Videos
- Laparoscopy
- Pediatrics
- Medical Humor
- Cardiothoracic Surgery
- Nursing Videos
- Plastic Surgery
- Otorhinolaryngology
- Histology and Histopathology
- Neurosurgery
- Dermatology
- Pediatric Surgery
- Urology
- Dentistry
- Oncology and Cancers
- Anatomy Videos
- Health and Fitness
- Radiology
- Anaesthesia
- Physical Therapy
- Pharmacology
- Interventional Radiology
- Cardiology
- Endocrinology
- Gynecology
- Emergency Medicine
- Psychiatry and Psychology
- Childbirth Videos
- General Medical Videos
- Nephrology
- Physiology
- Diet and Food Health
- Diabetes Mellitus
- Neurology
- Women Health
- Osteoporosis
- Gastroenterology
- Pulmonology
- Hematology
- Rheumatology
- Toxicology
- Nuclear Medicine
- Infectious Diseases
- Vascular Disease
- Reproductive Health
- Burns and Wound Healing
- Kidney Zone Podcast
- Other




Full Obstetric Examination Part 2
Mohamed. Full Obstetric Examination Part 2 [video]. MedicalVideos.com; 2024 Jan 17 [cited 2026 Nov 21]. Available from: https://www.medicalvideos.com/watch/full-obstetric-examination-part-2_EfSquwmeaFBwwWQAn3Ao.html
Mohamed (2024, January 17). Full Obstetric Examination Part 2 [Video]. MedicalVideos.com. https://www.medicalvideos.com/watch/full-obstetric-examination-part-2_EfSquwmeaFBwwWQAn3Ao.html
Mohamed. “Full Obstetric Examination Part 2.” MedicalVideos.com, 17 Jan. 2024, https://www.medicalvideos.com/watch/full-obstetric-examination-part-2_EfSquwmeaFBwwWQAn3Ao.html. Accessed 21 Nov. 2026.
@misc{medicalvideos2024_EfSquwmeaFBwwWQAn3Ao,
  author = {Mohamed},
  title = {Full Obstetric Examination Part 2},
  publisher = {MedicalVideos.com},
  year = {2024},
  month = {1},
  url = {https://www.medicalvideos.com/watch/full-obstetric-examination-part-2_EfSquwmeaFBwwWQAn3Ao.html},
  note = {Video},
  urldate = {2026-11-21}
}Vancouver (NLM) is the manuscript standard for medical journals. RIS imports into EndNote, Zotero and Mendeley.

Educational only: videos on MedicalVideos.com are for general information and are not medical advice. Always consult your own doctor about your health.
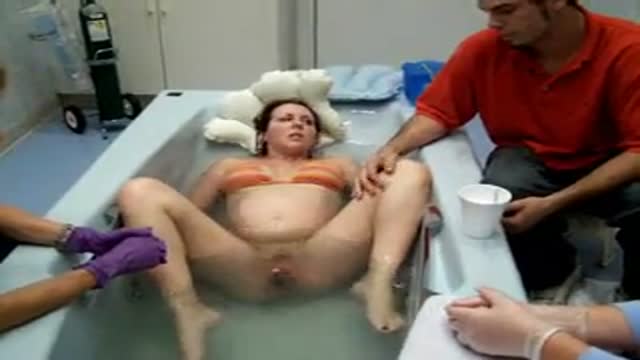
Part 2. Full Obstetric examination and normal delivery by Egyptian doctor Hussein Sulayman and the video is in English showing: Obstetric Examination Episiotomy Obstetric Forceps Obstetric Instruments
This video in 30 seconds
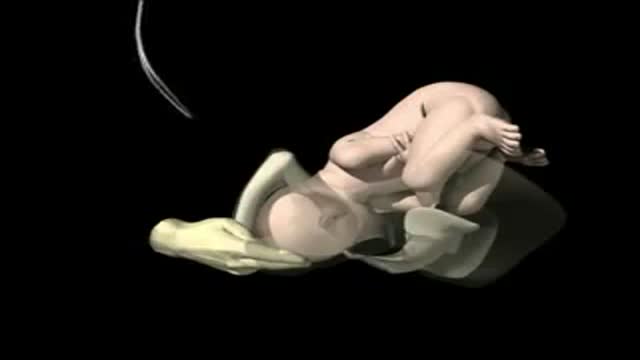
Part 2 of an obstetric teaching film opens with the layered stitching of an episiotomy. It then gives a detailed tour of obstetric forceps, their indications and application in low-cavity delivery, repair of a cervical tear, and ends with pelvimetry measuring the pelvis externally and internally.
Key points
- Layered episiotomy repair is shown in detail
- Obstetric forceps design, curves and locks are described
- Indications and conditions for forceps delivery are discussed
- Forceps blade insertion, locking and traction are demonstrated
- Pelvimetry is performed externally and internally
Chapters
- 0:03 — Layered episiotomy repair
- 5:37 — Obstetric forceps design and curves
- 11:53 — Indications and conditions for forceps
- 13:46 — Inserting blades and traction
- 20:41 — Low cavity forceps design
- 26:07 — Kielland forceps for rotation
- 32:21 — Repair of a cervical tear
- 39:49 — Pelvimetry external and internal
Video Transcript
Part 2 of the Egyptian obstetric teaching film: it opens with the layered stitching of an episiotomy, then gives a detailed tour of obstetric forceps and their application in a low-cavity delivery, and ends with pelvimetry — measuring the pelvis externally with a pelvimeter and internally by hand. It overlaps heavily with the full-length obstetrics tape elsewhere in this batch, including the same closing segment.
Read the full transcript
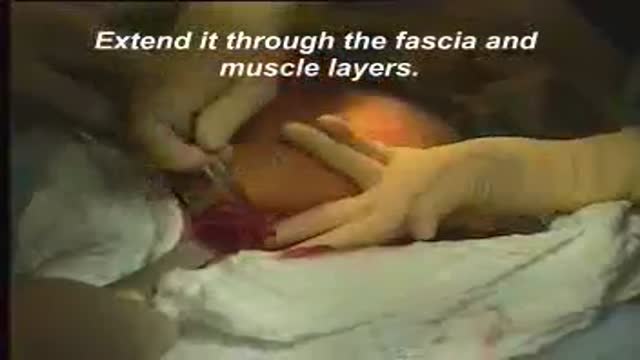
Then a continuous through and through stitch taking the vaginal mekosa. Here we are. Then we take a stitch at the foreshad here where is the remnant of the hymen. We adjust the foreshad together and then another stitch between the foreshad and the mucocoutinous junction. And then our last stitch at the mucocoutinous junction here. Then we tie. And this is our first layer in stitching the episiotomy. We stitch it here and then we come to stitch the perineal muscles. That is the perineal muscles. Then we put about two or three interrupted figure of eight hemostatic sutures.
Using number one chromic cadgett here. And then we'll go again to make a figure of eight. Here it is through the perineal muscles. Another stitch figure of eight because figure of eight sutures are hemostatic. And by this we can prevent the incidence of hematoma in the eschewal rectal fossa as well as infection. Then our last layer is the skin by interrupted sutures. And then we can use either plain or chromic cadgett. But here we change the needle to a cutting needle instead of the round one which we have been using on the vagina and in the muscle.
We cut the thread too short, very short as possible. So it wouldn't hit the patient later on and pricking the patient as this area is very sensitive. Very short cut edges. And of course using the cadgett we do not bring the patient to take any stitches out. So the cadgett would dissolve by itself. And here the skin is sutured and completed. Here we are. The obstetric forksips are designed to grasp the fetal head when it is in the vagina and affect delivery by traction without causing injury.
They are the long curved, the small wriggly forksips and the keyland forksips. This is the long curved obstetric forksips. The most famous are Neville's type and Milne-Marie type. This is the Neville forksips. Any obstetric forksips however the long, the short or keylands consist of two arms or branches. The branches are named right and left according to the side of the maternal pelvis into which it is introduced. Each is formed of four components, the blade, the shank, the lock and the handle. The branch of this forksips is about 15 inches in length and is made of four parts.
The blade, 7 inches in length, finistrated to be light and to minimize compression of the fetal head and to avoid slipping of the forksips by allowing the parietal eminence to protrude through the finistra. Each blade has two curves, a catholic curve and a pelvic curve. The catholic curve conforms to the shape of the fetal head and is adapted to provide a good application to the fetal head and the pelvic curve with that of the birth canal. The blades are connected to the handles by the shank which give the requisite length to the instrument.
The two blades are separated by about 3.5 inches allowing a fist to pass in between. At their tips, the distance is about 1 inch allowing two fingers to pass in between. The shank is about 2 to 2.5 inches in length to allow locking of the blades outside the vagina. Its lock is that of slot or English lock. Other forksips have sprue or French lock or combined or German lock. The blade is about 6 inches in length and either serrated to give a good grip on the hand or smooth like this forksips.
This is the axis to action piece which is attached to the forksips. Here it is. It is fixed to the forksips. The value of this axis to action piece is to allow traction in the correct direction of the birth canal. That's to say downwards and backwards and to avoid loss of force against the symphysis pupus. This will be achieved by getting these two arrows along each other during the traction. As we can see, we bring these two arrows together during the traction. Anyway, this technique of axis to action is largely unnecessary in present day practice
in which difficult forksips delivery is avoided. As you can see here, that is the way how we pull and use the axis to action piece. As high forksips delivery is not nowadays used and what is more commonly used in present day practice either mid forksips or low forksips. Now we come to the indication of forksips delivery. First we have the prolonged second stage. Whenever the second stage is prolonged then half to one hour. And then we have fetal indications. When there is fetal distress or if there is prolapse pulsating cord
or if there is the after coming head in breach delivery or in elective, in placental insufficiency. Maternal indications either maternal distress or in maternal diseases as heart failure, preclinical semiya, pneumonia, etc. When we apply the forksips we must have conditions before applying it. What we call the conditions to be fulfilled before forksid delivery. These are fully related cervix, ruptured membranes, head must be engaged. There is presence of uterine contraction, the bladder should be empty. There is no kefalopelver dyspore portion. The head is in a suitable position and also anephasia or bilateral budendary nerve block
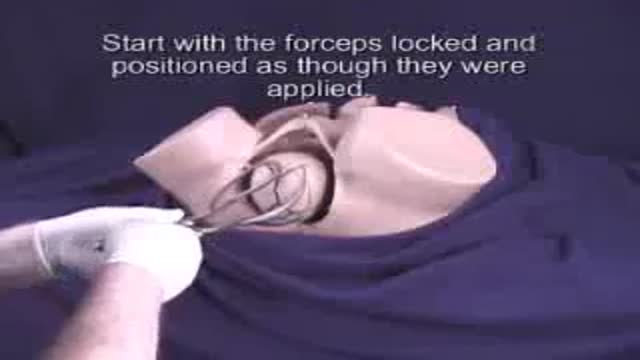
as well as complete aseptic techniques. Now we are going to see together how we do mid-cavity forksips delivery. In this patient the indication for the forksid delivery is fetal distress while she is in the second stage and the cervix is fully dilated. Now this is neville bounce forksips which has got a pelvic curve and a kefalic curve. This is a way how it would be locked inside on the fetal head. This is the right blade which is held by the right hand and is applied on the right side of the patient.
Now we are going to insert the left blade. We will locate the left blade which is held by the left hand and is going to be inserted on the left side of the patient. By putting the right index and middle finger inside the vagina and then sliding the blade along the fingers between the fetal head and the vaginal wall sliding easily and smoothly until it slides and inside. The same procedure is done with the right blade and then lubricated by hebitane or visavlon and then the left fingers are now put and the blade is held by the right hand
and then would be slide smoothly between the fingers and the fetal head as this. This is to be guided here. And then when the forksips is properly applied on the fetal head it will lock easily as you can see. If it doesn't lock easily so you have to take the forksips out, recheck the position of the fetal head and then reapply it again. I just would like to remind you that the cervix must be fully dilated and the bladder must be empty. Now we are going to do a small episiotomy here as you can see
and then we start traction. Then you unlock every now and then you unlock the forksips. So this would relieve the pressure on the fetal head and then start traction again, especially with a uterine contraction. Now here it is. See the head is coming and out and then you would support the perineum so the episiotomy will not be extended here and support the perineum and until you see the ox putt is being delivered or merged under the symphysis pupus then you start to lift the head here. To lift the head, that's ox putt here.
And then you start to lift your hands with the forksips to deliver the baby's head in extension. I just would like to remind you with the conditions to be fulfilled in doing forksip delivery. The patient must be catheterized and the bladder should be empty. There is no kefalopelvic discipore portion. The head in this suitable position and is engaged. The cervix must be fully dilated. These are the main criteria before doing forksip delivery. Again to our patient, the head is now delivered by extension and then we take the blades of the forksips out.
Now we help the mechanism of restitution and external rotation of the head and then delivering the anterior shoulder, then the posterior shoulder of the baby and this would the baby will follow. You can notice the meconium, the heavily meconium is turned like or due to the fetal distress. Now we clamp the umbilical cord and then we cut the cord and handle the baby to abit iteration for resuscitation. We check the uterus is firmly contracted over the placenta and the anesthetist should give metharagin at that time. And then we can test the separation of the placenta by making a gentle traction on the cord
and see how whether it is elongating or still fixed here. It is still fixed. We just would like to enumerate together the causes of failed forksips. We can divide these causes into maternal causes and fetal causes. If we have a tender maternal, then we can see there is contracted pelvis or contraction ring. This is definitely will cause failure of forks of delivery. If there is incomplete dilatation of the cervix, so you can't apply the forksips probably and hence there will be a failed forksips or extensive laceration of the cervix.
The presence of pelvic tumor which may obstruct the birth canal and then will cause failed forksips. Under fetal causes when we get a large head or hydrocephalic head, this would cause failure of forks of delivery or extensive laceration of the birth canal. If the head is not in the proper position, then application of the forksips will be difficult and hence failure of it. High head is already condemned and in high forks of delivery is not used anymore in present day practice. Then we have locked twins and double headed monsters as causes of failed forksips.
Now when we come to discuss the complications that may occur in forks of delivery, again we have maternal complications and fetal complications. Under maternal complications we get lacerations and injury or postpartum hemorrhage or perperecypces or even late complications as prolapse associated or not associated with stress incontinence or even habitual abortion due to incompetent cervix. Under fetal complications we have injuries of different varieties of injuries or asphyxia of the baby. This is a regular forksips and it is used in low forks of delivery. It is a short, light, curved one designed to be used when the head is low down.
Still it has got a pelvic curve and this is a pelvic curve and this is a catholic curve and this is 11 inches in length. It also has got an English sliding lock. Here it is. An English sliding lock and a short small handle. Let us see together how we use it clinically. This is a case of delayed second stage while the head is low down on the perineum and we are going to use the wriggly forksips in delivering the baby. As you can see here that is the hair of the baby here shown.
That is its scalp. You can see how low down is the head. This is the wriggly forksips and then we should lock the wriggly forksips outside so we know how we are going to apply it. Here it is. Then it has got two blades, right and left. We are going to apply the left blade. The left blade which is held by the left hand and introduced onto the left side of the patient. We lubricate the blade and then we insert the right index and middle finger here
between the head and the vagina and then we smoothly insert the blade this way, sliding it inside. The same procedure will do it on the other blade, the right blade. We are holding the right blade with the right hand and is inserted onto the right side of the patient. Again putting the fingers. Some people they put the four fingers either to intervene between the fetal head and the vagina. Here that is how to insert the blade and then it will be guided by the fingers inside and then we will smoothly insert it.
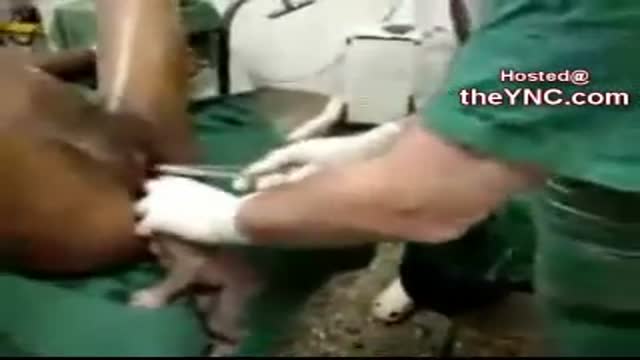
When the forksips is probably inserted on the fetal head so it easily locks. Here easily locks. If there is any difficulty in locking the forksips take it out, reexamine the position of the fetal head and then apply the forksips again. Now we are going to do a small snip of episiotomy. Here this is the midline. We just on the right side of the midline just a small snip. The patient here is under general athesia and that's why we didn't do infiltration of the perineum by a local anaesthetic.
Then gentle traction on the head. Again in the downward and backward direction. But here it doesn't require really much traction because the head is low down. It's not in the mid cavity as we have seen in the previous case. Here gently downwards, downwards here, downwards and backwards. Again I'm reminding you downwards and backwards in the direction of the birth canal. Then we support the perineum with a swap or a big piece of goes. Here supporting the perineum and then getting the head. Once the ox foot merges under the synapses pubis.
Here then we lift the head up to get the suboxyptobregmatic diameter extending the enthritis here. And the baby is delivered by extension. Now the head is out and in this patient actually the baby was in the right occipital anterior position. And then we are going to help restitution of the head. That's why I'm turning it to the right side as it was. To the right side of the patient as it was. And then helping the external rotation to get the shoulders. This is a loop of the umbilical cord around the neck.
So I am releasing the loop here. And then this anterior shoulder is coming behind the synapses pubis. Then the posterior shoulder and that is the rest of the baby here. As you can see that the back was on the right side of the patient. Now the baby is out and then we like it the umbilical cord. We clamp it, cut it and then the baby is handed to pediatrician for restitution. This is keelans obstetric forcips. Still has two branches. Each has a blade, a shank, a lock of the sliding tire.
And a handle. It is different from all other forcips by not having a pelvic calf. You can see how this forcip lies flat on the table. You see very minimal pelvic calf compared to other obstetric forcips. Then we can see the difference. Here it is. This is a regular forcips. And you see how the blades are elevated from the desk or the table. And here the keel and forcips are resting on the table. You can see the difference. That is a pelvic calf. Again this is an anvil forcip.
You can see how the blades are elevated from the level of the table. Showing a marked pelvic calf. The idea of the regular forcips. Not having a pelvic calf that we can use it in obstetrician positions. And then we can rotate the head all around in the pelvis without reapplying the forcips. Only in one application used in rotation and delivery of the fetal head. And here this is a minimal. The advantage of having a minimal pelvic calf. And this is the indication, the main indication of using the keel and forcips.
Here it has got a two knobs on the handle. Here the two knobs. These two knobs are directed towards the baby's ox foot when applying the blades of the forcips. Here as a lock, a sliding type of lock. And this is the handle. The sliding lock allows the blades to slide up and down on each other. And correct acyclicism of the fetal head. We take the advantage of the keel and forcips not having a pelvic calf. So we can apply it on the baby's head to rotate it and delivering it as well.
And this particularly in persistent occipital posterior position, in persistent mental posterior and in deep transverse arrest. It's not commonly used nowadays because Vento's delivery has taken its place. Following the delivery of the baby, however instrumental or normal, you always check that the uterus is firmly contracted. There is undue bleeding. You first manage the case by compressing the uterus. In these cases, you first check the uterus. If it is lagged by a manual compression, it should be done. This is of course, is accompanied by intravenous injection of the mythogen as well as syncynone.
This photograph will show how we compress the uterus. The right hand is inside the vagina and the left hand is squeezing the uterus from the abdomen. The other picture is another maneuver in compressing the uterus. If the cervix, the degree of dilatation of the cervix allows the fist to go inside the uterine cavity and with the left hand again on the patient's abdomen, we squeeze the uterus between both hands. You can maintain this maneuver for a few minutes until you feel the uterus is firmly contracted and no further bleeding is occurring.
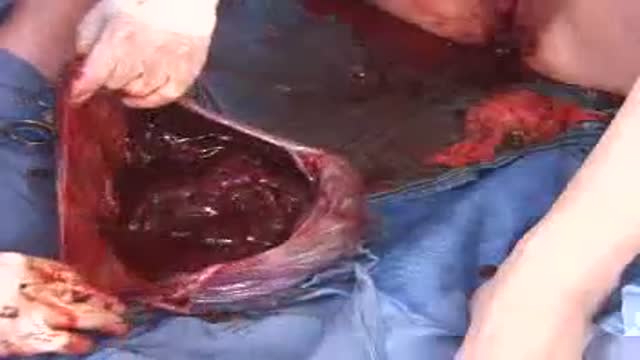
If still there is uterine bleeding, in spite the uterus is firmly contracted, the vagina and cervix must be explored. Let us see together how we are going to explore the vagina and the cervix. Here, you can see how excessive vaginal bleeding is occurring. My left hand is on the uterus and the uterus is firmly contracted and then we are going to put a posterior vaginal speculum or sims speculum to see the cervix and then with a sponge holding forcips. We are going to hold the anterior lip of the cervix.
In this case, there should be about four or five sponge holding forcips available. We do not use the usual forcelum because the cervix after delivery is very soft and using the toothed forcelum would lacerate the cervix. That's why we use the sponge holding forcips, which is not traumatizing to the soft tissue of the cervix. Here we are trying to catch the anterior lip as well as the posterior lip. We mop every now and then to see what we are holding with the sponge forcips. Now, we can explore with the fingers now and in this case, there is a tear on the right side of the cervix.
Here it is, as you can see. That is the tear here and then we are going to stitch the cervical tear. We are starting far back here at the angle of the tear, putting the needle through the posterior lip, then through the anterior lip. Then we usually use chromic cadgott, number two chromic cadgott, to be strong. Then figure of eight hemostatic sutures, again through the posterior lip and then through the anterior lip of the cervix. That is the stitch. Then when we tie it, it will be a figure of eight, will make a figure of eight hemostatic sutures.
This is a diagram to show what I am doing. That is the anterior lip, posterior lip and the needle through both of them, through the tear. Again to our patient, I am tying here the first stitch and then we hold the tip on an artery forcipes. We don't cut the thread as my assistant wanted to do, but we hold it with an artery forcipes because it will help us traction. We can make traction on it so it would expose any further tear. You can see this is another, the tear is further inside here
and then we are going to put another stitch proximal to the first one. You can notice that. Here it is. If you cut the thread of the first suture, you can't make good traction and this part would be slipped and you wouldn't notice it. But making a traction with an artery forcipes, holding the thread of the first suture, the angle of the tear could be exposed and if it requires another stitch you can put it as I am doing now. Here it is another stitch. Figure of eight hemostatic sutures using chromic number two cat cut.
On a round body needle, not using a cutting needle. Here this is another diagram to show what we are doing. That's the cervix and that's suture here. Now there are two stitches have been put and then the tear requires a third stitch. You can see and notice that the bleeding has stopped or even very minimal. Again with the round body needle, through the posterior lip, through the anterior lip, another figure of eight suture. Here back through the posterior lip and through the anterior lip of the cervix.
You can see how the cervix is so soft after delivery. It is not the usual cervix which we see during vaginal examination, routine vaginal examination in non-pregnant patients. When we tie, I usually put three knots actually on the tie to be safe and secure. One, two, here, three stitches have been put and then we mop and then here we are exposing now the tear which is being sutured and no bleeding has occurred. The bleeding has stopped. We cut the stitches and that's it. This is how to suture a cervical tear.
Let us see together few instruments used in obstetric practice. This is mucus sucker and is used in sucking the mouth and nasopharynx of the baby after its delivery. But nowadays we use a catheter, a soft catheter connected to a suction pump. It has got an opening on one end and then we suck on the other end and there is a reservoir in the middle. It is preferable to use the suction apparatus. This is Drus Meith catheter which is an S shaped as you can see and it has got a curve which fits to the head of the baby.
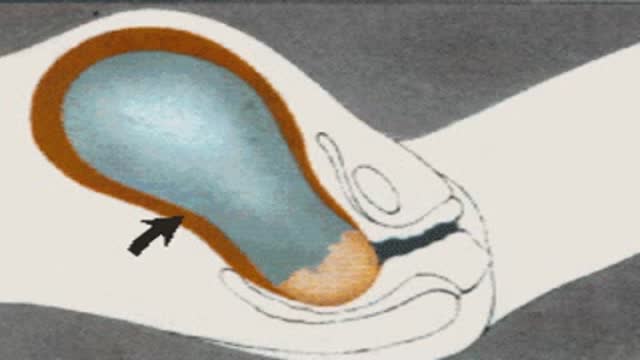
And it has got a here, this is a steel net which is threaded through its lumen and comes out at tip here. And then when we apply it in the uterus and then to induce or to break the hind waters in cases where we cannot do forewater rupture as in high ballotable head and then we introduce the Drus Meith and this curve will fit behind the baby's head here. It fits here and that part would be between the fetal head and the wall of the uterus. And then we push the steel net here like this and its tip will hit the amniotic sac, rupturing the amniotic sac.
And then the amniotic fluid will go, you can see the tip of the steel net here. The amniotic fluid will pass through the hole and will come down through the other opening here. It has got a double exit. This is a picture to show the Drus Meith catheter inserted here between the baby's head and the wall of the uterus. Here, that's where it lies here. Here it is. And then by pushing the tip of the steel net we rupture the amniotic sac and the amniotic fluid is drippling.
This is an external pelvic meter which is used in the past but not in present day practice. As I have got two arms here where they move on a scale and is used to measure the bicepiness diameter by fixing the two ends of the both arms. One on each side of the anterior superiorly spine. We can use it as well to measure the external conjugate by putting the two ends, one on the simpsons bupus and the other one on the back of the patient at the first sacral vertebra.
And then we can read the distance between the two arms on the scale. This is a photograph which we use it as well in internal pulvermatory. So these fingers are measuring the internal conjugate diameter through the vagina. And then we mark the length at the lower board of the simpsons bupus. Then using the pelvic meter an assistant will measure the distance between the tip of the middle finger which was lying at the sacral pulvermatory and the marked point which was lying under the simpsons bupus. And this will measure the internal conjugate diameter.
By this we come to the end of this tape and hope to see you again in part 2 to complete the other obstetric procedures and operations. Thank you and goodbye.
Transcript auto-generated from the video’s audio for accessibility and study. Educational content only — not medical advice.
Related reading
Save videos for later
Create a free account to build your own watch-later list and playlists, and pick up where you left off on any device.
Medical Videos
Free medical and surgery videos for patients, students and professionals — trusted since 2007.
Founded by Dr. Mohamed Ibrahim, MD, PhD — physician-scientist.
Follow us on Facebook · Instagram
SORT BY-
Top Comments
-
Latest comments